How to get the most out of events with the Sharetribe CLI
When something happens on your marketplace, Sharetribe tracks it as an event. Events are useful for real-time integrations, but they can also be used to investigate the history of a single resource, such as a user or a listing, with the Sharetribe CLI. In this article, we will learn how to use the options in the CLI, as well as a tool called jq, to find the details we want to investigate.
Oct 10, 2024
When something happens on your marketplace, Sharetribe tracks it as an event.
Events are very useful in reacting to marketplace activity in real time. Many marketplaces have integrations that use event data to perform actions in either their own marketplace, or in different integrated systems. The Sharetribe Zapier no-code integration is also built on top of events.
In addition to being useful for real-time integrations, however, events can also be used to investigate the history of a single resource, such as a user or a listing, with the Sharetribe CLI. If you have not yet used the Sharetribe CLI, you can check out this article for more instructions on how to get started.
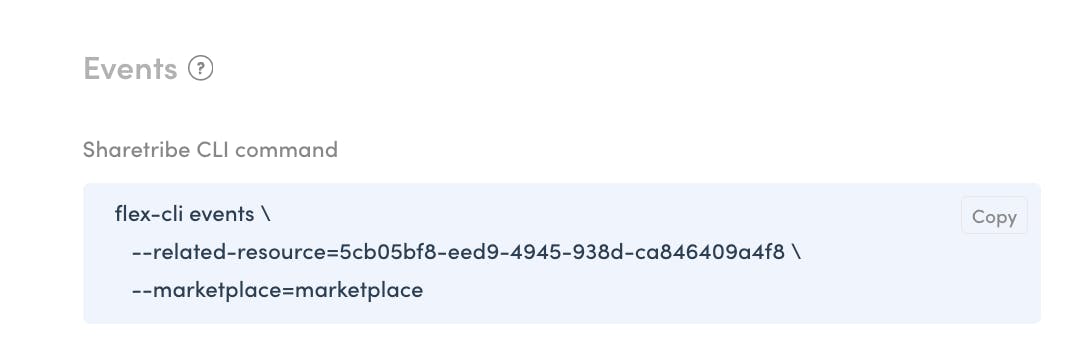
When you visit your Console, you can see an example event query towards the bottom of each detail card. When you copy this query and paste it into your terminal, you can see the available events related to this resource as a response. In Live environments, events are maintained for 90 days, and for Test and Dev marketplaces, events are maintained for 7 days.

When you run the example events query, you can see a list of events that have taken place most recently related to this resource.

Viewing events in this way is very safe – you can not make any changes to anything with the events query, so you can freely explore and investigate the information available to you. In this article, we will investigate how to use the options in the CLI, as well as a tool called jq, to find the details we want to investigate!
How to view and filter events with the CLI
The default view for events is a list that contains all types of events on the marketplace. The CLI has some tools that you can use to narrow down the events you want to view, so it is easier to find the event you are looking to investigate. You can see all those tools with flex-cli help events.

We have already used one of these – the example query in Console contains the --related-resource option with the correct ID. This narrows the events down to all events that are in any way related:
- For a user, related resources include the user themselves, as well as all their listings and transactions, and bookings and reviews associated with those transactions
- For a listing, related resources include the listing, as well as transactions, bookings, and reviews related to the listing
- For a transaction, related resources include the transaction, and the booking related to the transaction
- For a review, only the events related to the review itself are included
Options for events CLI queries include:
- --related-resource=[resourceId] : This command is used in the default event queries you can find under each resource in Console. Adding this option narrows the query down to events where this resource is relevant – for a listing, this could be listing events, transaction events, review events, and so on.
- --filter=[types of events you want to include]: The CLI shows up to 100 events at a time, so filtering them based on the type of event will allow you to focus on only the events you’re interested in
- --seqId=[sequenceId]: shows an individual event with the matching sequence id
- --before-seqid=[sequenceId]: Shows events before the specified sequence id
- --after-seqid=[sequenceId]: Shows events after the specified sequence id
Note that you can only use one sequence id related option – in other words, it’s not possible to add both –before-seqid and –after-seqid
- -l, --limit: limit the number of results you are fetching.
- --json: shows full JSON for the results. If you have a lot of filtering in place, this --json option is useful – but for the whole list of full event records, this is pretty overwhelming .
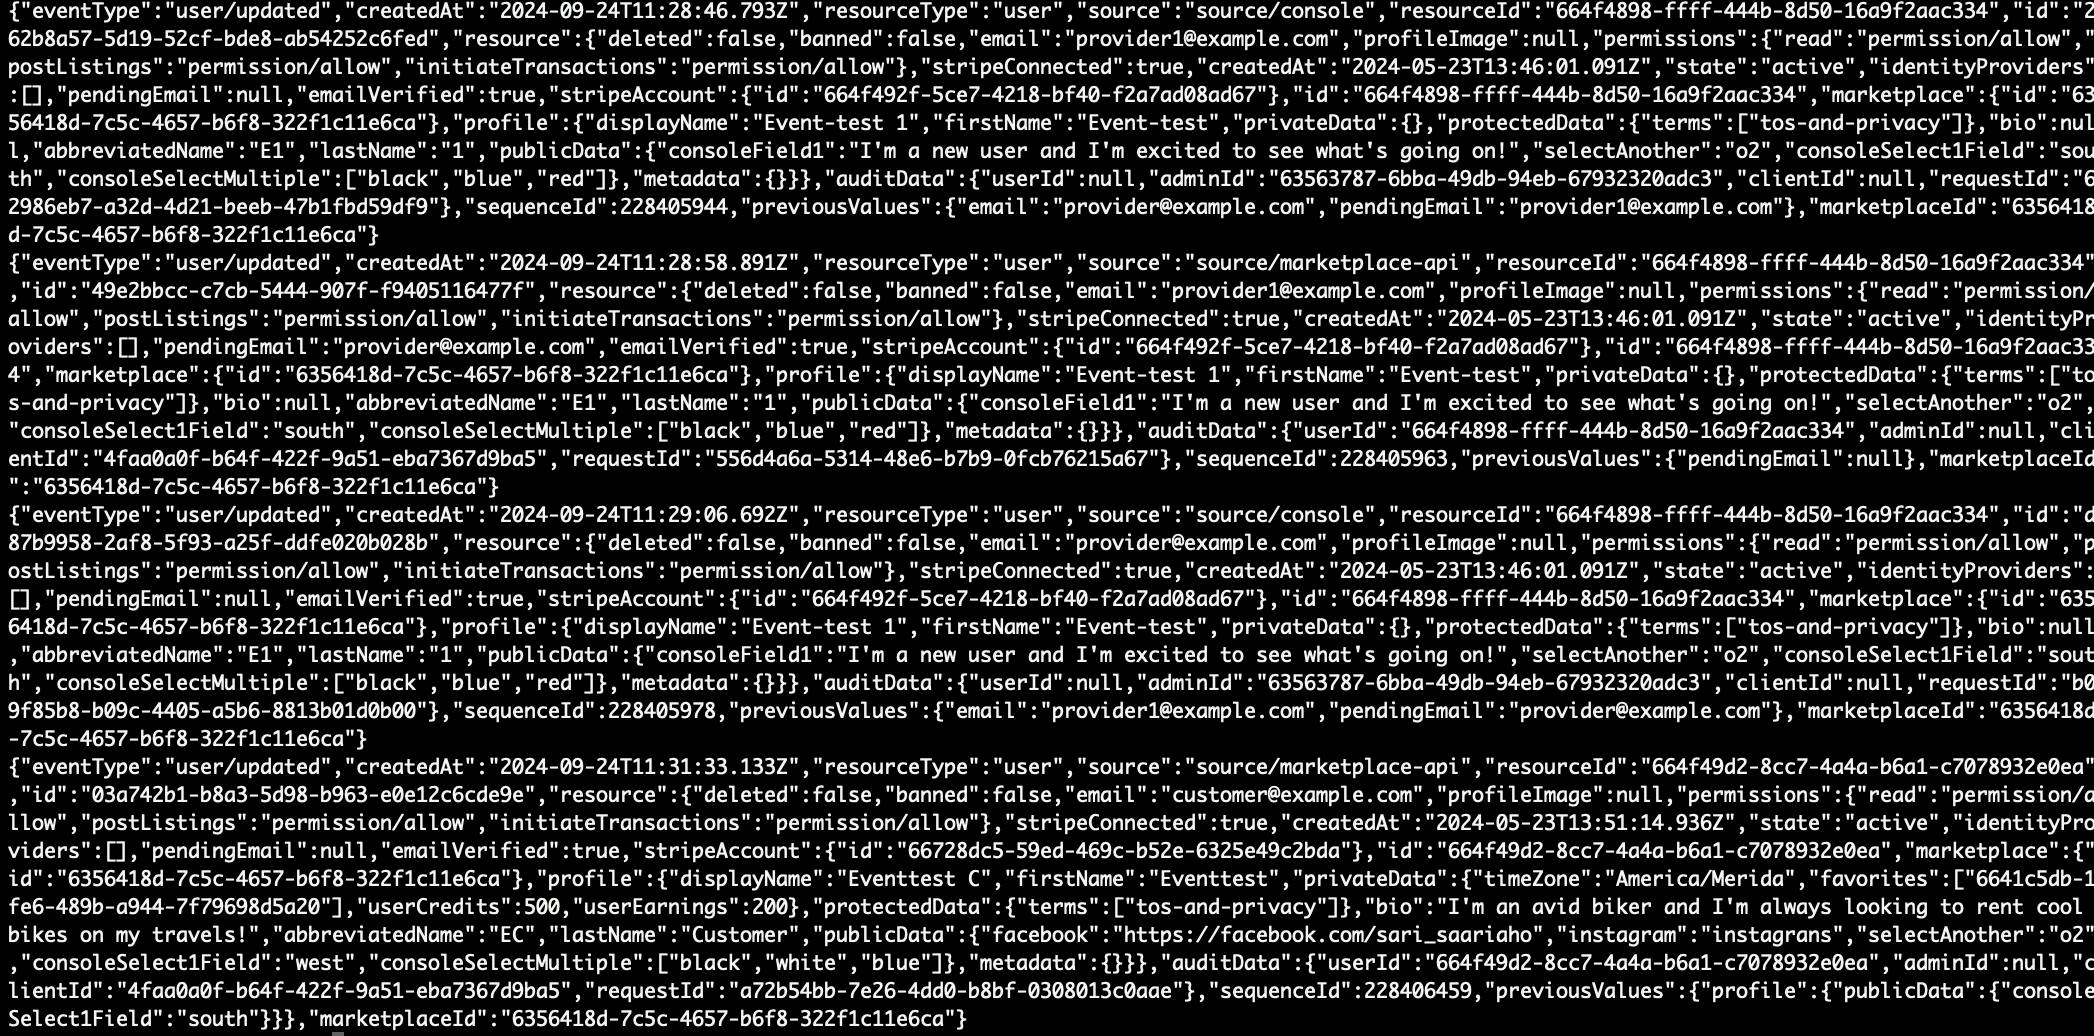
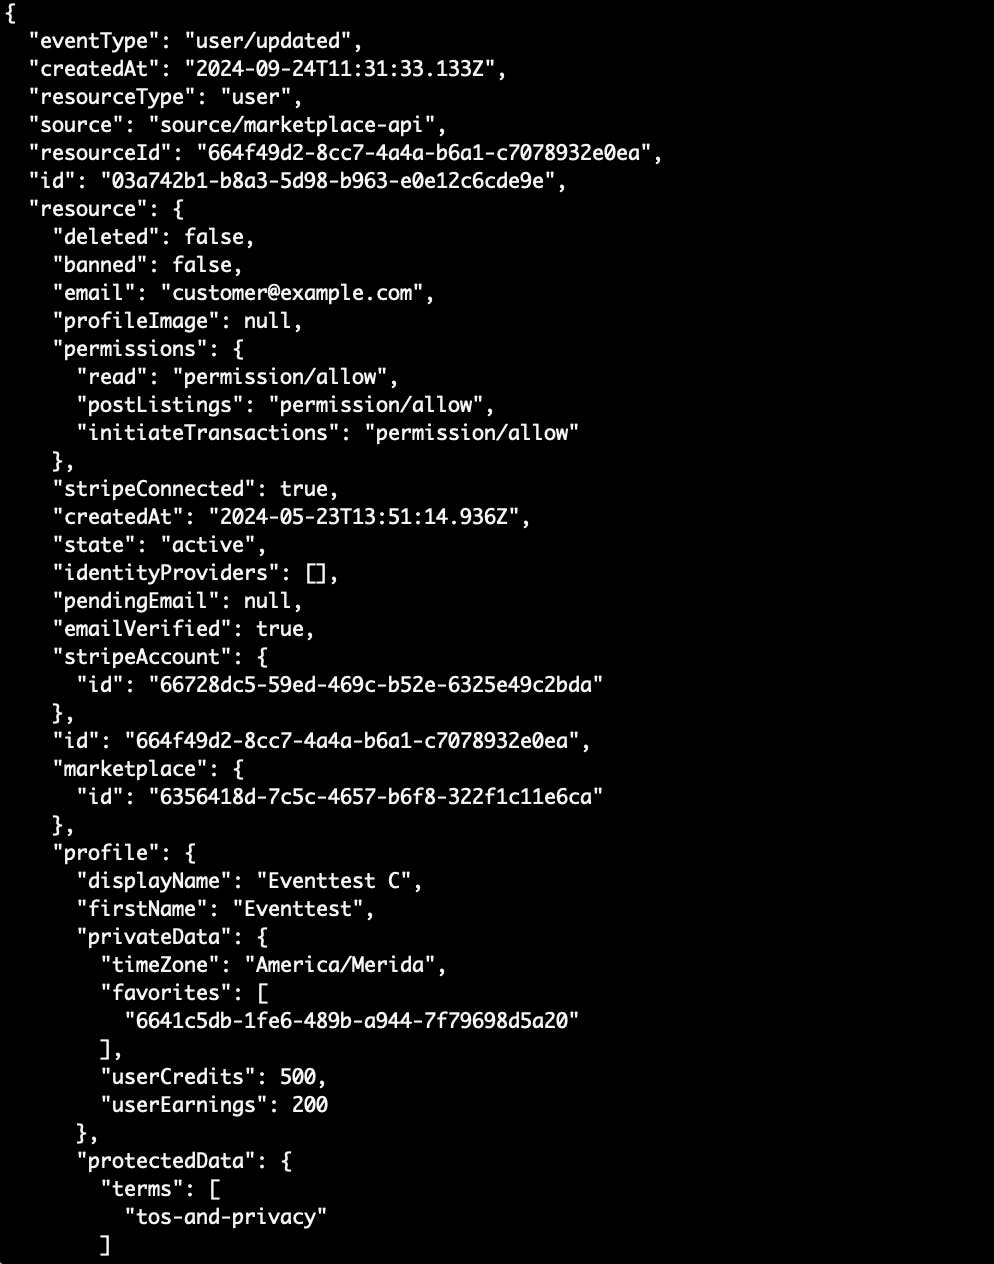
- --json-pretty: shows formatted JSON for the results. This is far easier to read, but for a list of full events, it is still pretty overwhelming
How to use jq to further filter and view the data
Once you have your filtered event data in a JSON format (either with --json or --json-pretty), you can use a tool called jq to further filter and display your results. In short, jq is a command line tool for manipulating JSON data. You can read more about jq in their own documentation.
The event resource contains a lot of attributes that you might not want to view for specific use cases, and jq allows you to process the data further.
The way to use jq is to pipe the results of our CLI command, in JSON format, to the jq command. Piping means that we take the output of the previous command and pass it as the input to the next command. In practice, we do it with the special character | .
For a simple jq command:
| jq '.'
the full context, complete with the CLI command, would be
flex-cli events -m [your-marketplace-id] --json | jq '.'
When we use | jq '.’ with our CLI query, we get essentially the same result that we get with --json-pretty – a formatted JSON. Depending on your terminal settings, the color scheme may also change.
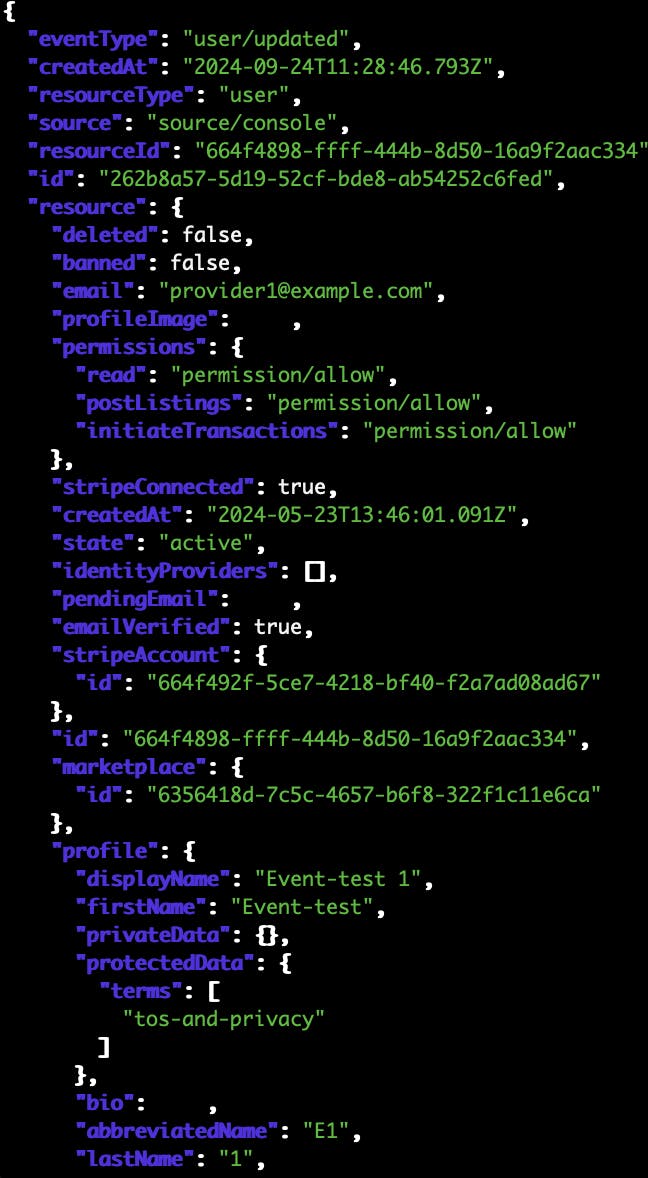
It’s good to note that whenever you call jq, you’ll need to wrap the command in quotes. Depending on the shell you are using, you might need to handle quoting differently – you can find more details in the jq documentation.
Note: depending on the amount of data in your events and individual resources, sometimes jq will have trouble parsing the JSON, and will throw an error
parse error: Unfinished string at EOF at line XX, column YYY.
When this happens, the likely culprit is that the result JSON is too large to be parsed correctly. You can try to work around this by filtering the CLI command more closely, or adding a --limit parameter to get fewer results at a time.
In this guide, we will look at two use cases for jq:
- Map the results to smaller objects for easier readability
- Further filter the result set with options that the CLI does not have
Map results to smaller objects
One use case for jq is mapping the full event resource to a smaller object, so that it is easier to investigate multiple events.
For example, we might want to know when a certain attribute changed for a listing or a user. For that information, we’d want to see the previous values of the event, because that will allow us to see which attribute changed in the event, and what was its value before the change.
In addition, we can include the timestamp of the event and its sequenceId – that way, we can identify the correct event if we want to review it in more detail.
To use the mapping function, we want to use the --slurp option. This option converts the individual event objects returned by the query into an array of objects, so we can then use the select function to include only the events we want to inspect.
| jq --slurp
Then, we can add the map function inside quotes. In the map function parentheses, we define the shape of the object we want to extract from the input JSON.
| jq --slurp 'map({ createdAt: .createdAt, sequenceId: .sequenceId, previousValues: .previousValues})'Note that we refer to the incoming JSON object attributes by a dot and the top level attribute name.
The results would look something like this:
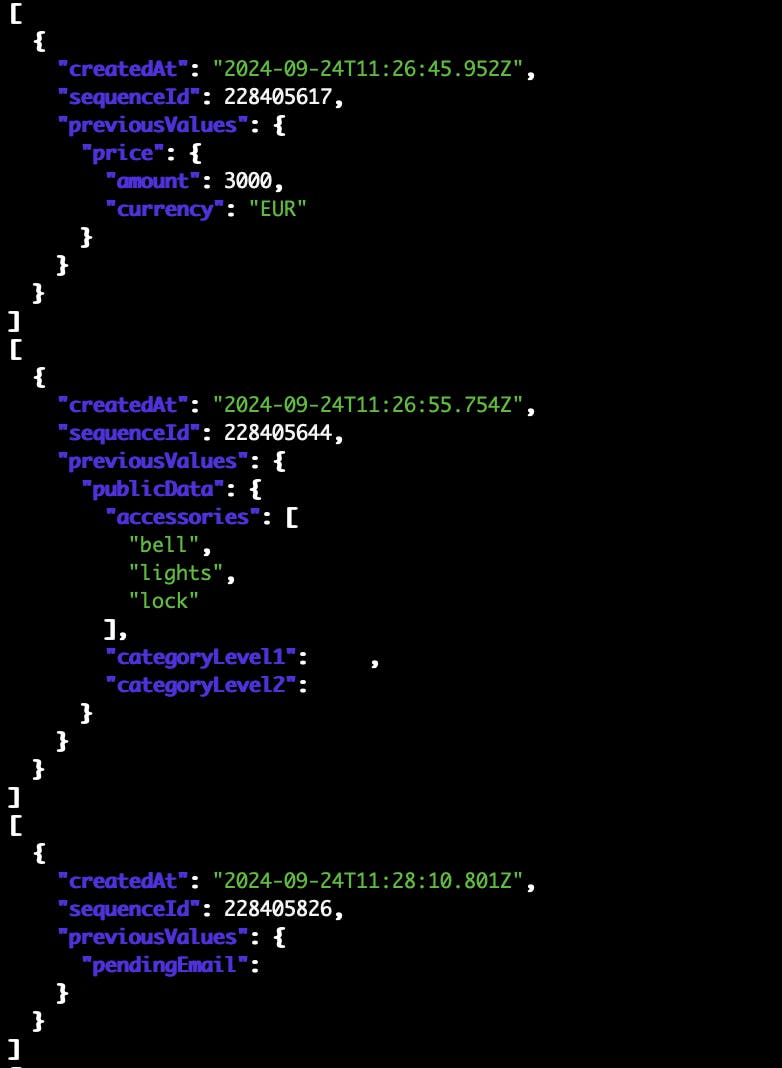
You can also add nested attributes to the map. For example, let’s imagine we are querying user/updated events, and we want to see when a public data attribute was changed. We could modify the query like this:
| jq --slurp 'map({ createdAt: .createdAt, sequenceId: .sequenceId, previousValuesPublicData: .previousValues.profile.publicData})'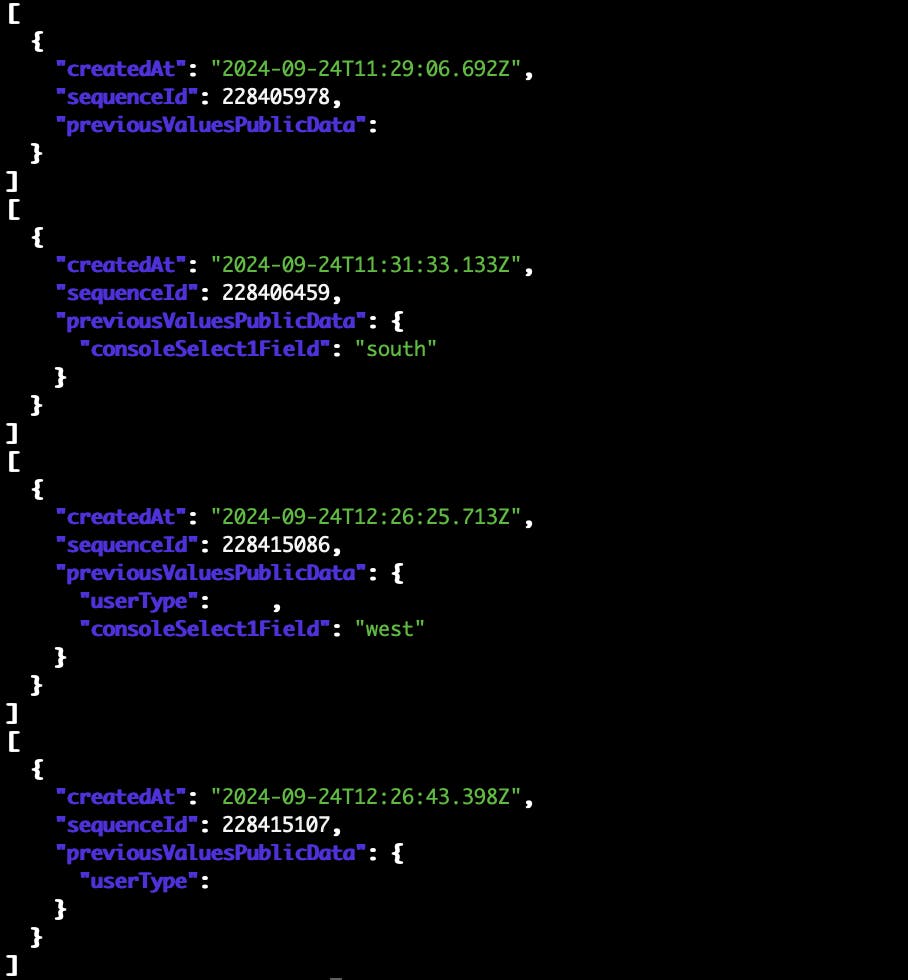
Because we know that the resource is a user, and that a user’s public data is under the profile attribute, we can map the nested attribute directly to our new top level attribute previousValuesPublicData.
Filter the result set
Filtering the events JSON further is another convenient use case for the jq tool. The CLI allows filtering by event type, but it is not possible to filter the results based on other details within the event resource. In jq, filtering is done with the select function.
With this query, we would include the events that were initiated somewhere other than the Marketplace API – for example, in the Console, in an automatic transaction process transition, or through the Integration API.
You can use select directly after the CLI query, without the --slurp option:
| jq 'select(.source != "source/marketplace-api")'
However, if you don’t have filters on your CLI query, you are more likely to get the parse error: Unfinished string at EOF at line... error.
If you use the --slurp option, you can handle slightly larger result sets. In that case, you’d need to use both the --slurp option and the value iterator – in other words, you first set the result objects into an array, and then parse them into individual objects again.
| jq --slurp | jq '.[] | select(.source != "source/marketplace-api")'
The example result shows two events of reviews being published by an automatic transition in the transaction process.
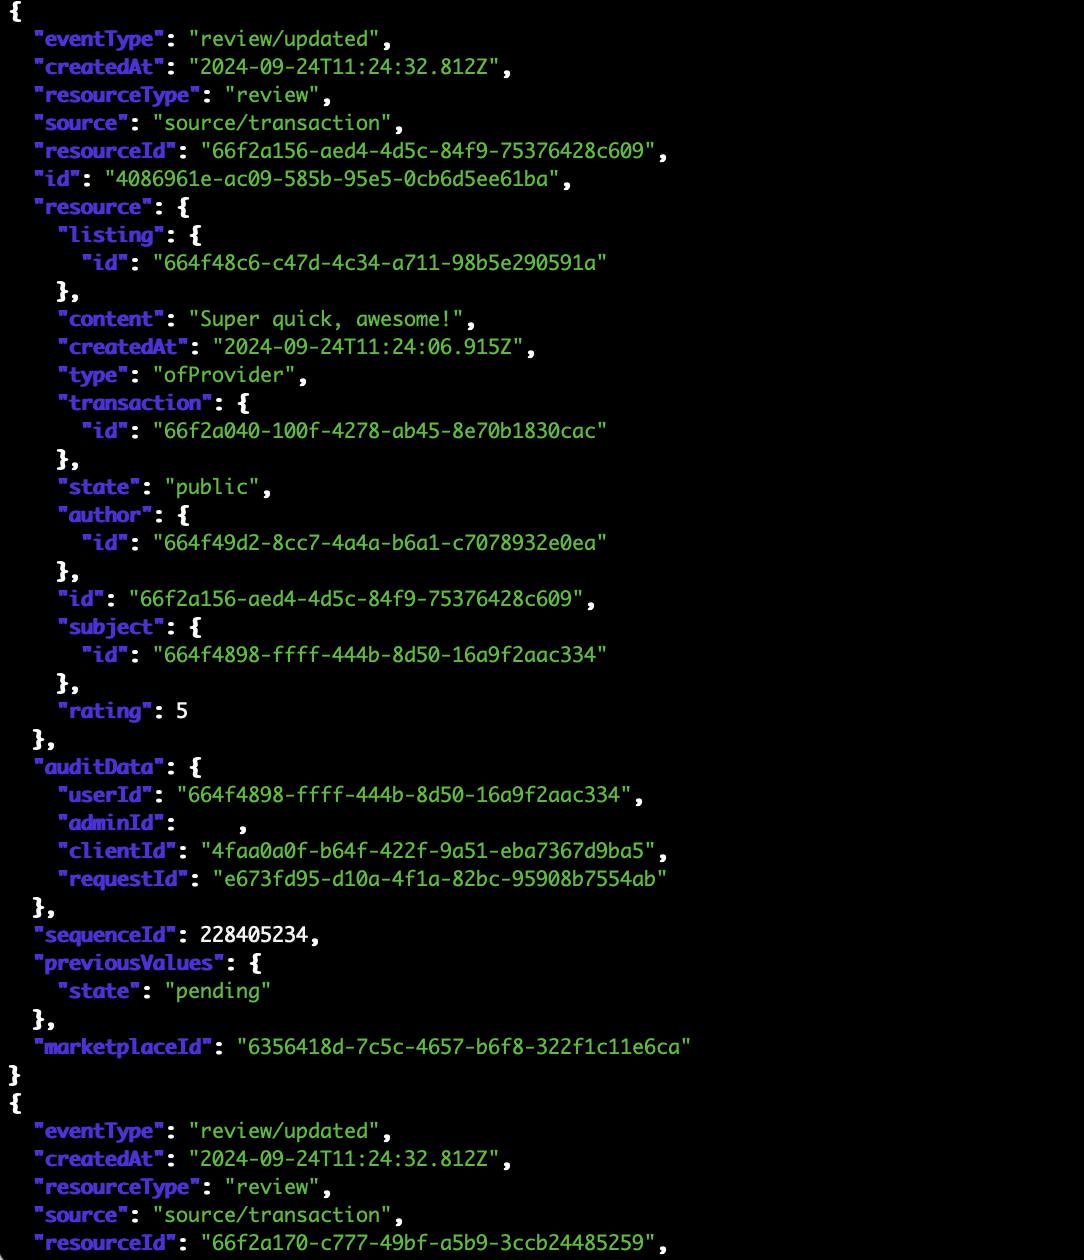
You can also chain select functions, since we can pipe the results from the previous query as the input of the next query.
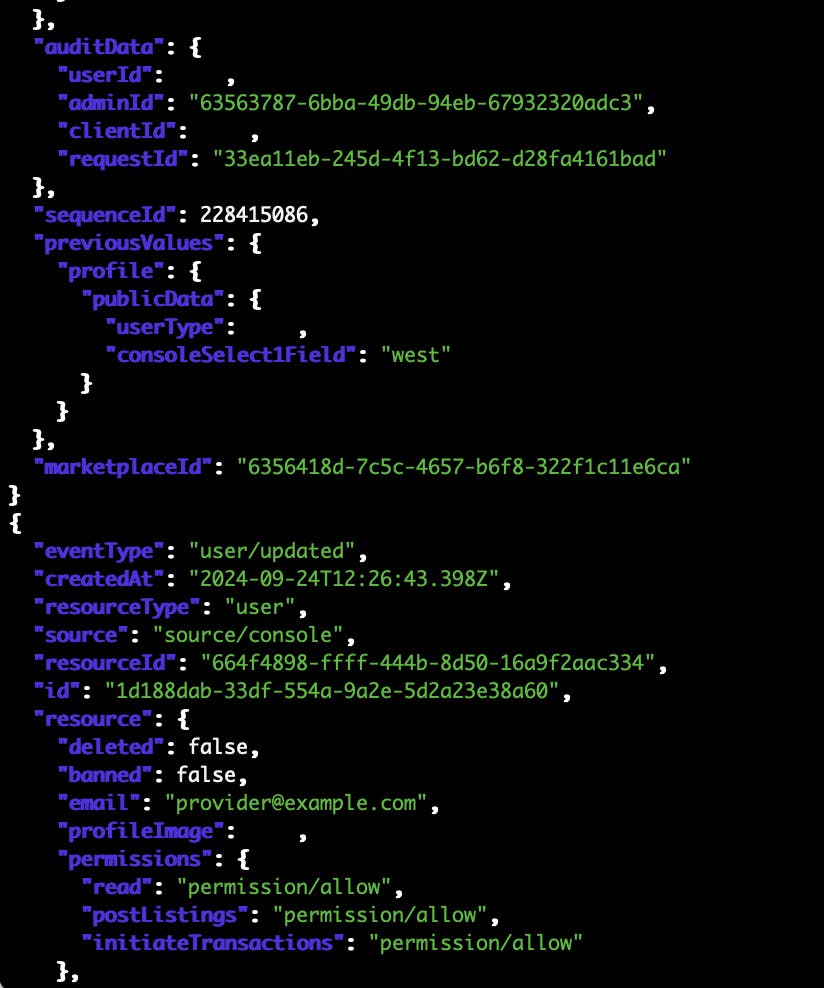
For example, if you want to see all the events made by a specific operator in Console, you can find their admin id in one specific event, and then use jq to see the events that they have initiated in Console.
To find the admin id, you will need to first run a basic event query without jq to identify an event triggered by the correct admin email in Console
flex-cli events -m [your-marketplace]

You can then inspect the event with the --seqid and --json-pretty options to see the admin id in the audit data
flex-cli events -m [your-marketplace] --seqid=228415086 --json-pretty

You can then use that adminId in your jq query to find all events by this admin. Remember to remove the --seqid option from your CLI query, so that you get more than one result!
| jq --slurp | jq '.[] | select(.source == "source/console") | select(.auditData.adminId == "63563787-6bba-49db-94eb-67932320adc3")'
Combine map and select
In addition to using the map and select functions separately, we can also chain them together. For example, if we have an Integration API integration that generates a lot of listing/update events, it’s useful to be able to only include ones that aren’t from that integration.
We can either first map the results into a smaller object, and then select based on one of those attributes:
--json | jq --slurp 'map({createdAt: .createdAt, source: .source, previousValues: .previousValues, sequenceId: .sequenceId}) | .[] | select(.source != "source/integration-api")'Or you can first use select and then map the results – for example, in a situation where we don’t need to see the attribute we used for filtering:
--json | jq --slurp '.[] | select(.source != "source/integration-api") | [.] | map({createdAt: .createdAt, previousValues: .previousValues, sequenceId: .sequenceId}) 'With both options, the result is the same – we get a filtered result set of smaller objects that we can then investigate further.
Since the jq filter only applies to the returned data (unlike the CLI filtering options that apply to all events in the Sharetribe backend), you may need to use the --before-seqid option in the main CLI command to view earlier events. This is why it’s a good idea to include the sequence id of each event in the map – that way, you can copy-paste the earliest sequence id shown to the command and view more events
Conclusion
Sharetribe events can be a rich source of information on what is happening on your marketplace. With the Sharetribe CLI and the jq command line tool, you can investigate the event data in a fair amount of detail.
If you have any questions about events or the Sharetribe CLI, or if you learned something useful in this article, we’d really enjoy hearing from you. Send us a message in your Sharetribe Console chat widget and mention this article, and let’s continue the conversation!

