Sharetribe Developer Blog

Welcome to the Sharetribe Developer Blog: a practical resource crafted for our developer community with a focus on how to build a marketplace using the Sharetribe Developer Platform.
Posts
Here you'll find all our Developer Blog Posts!
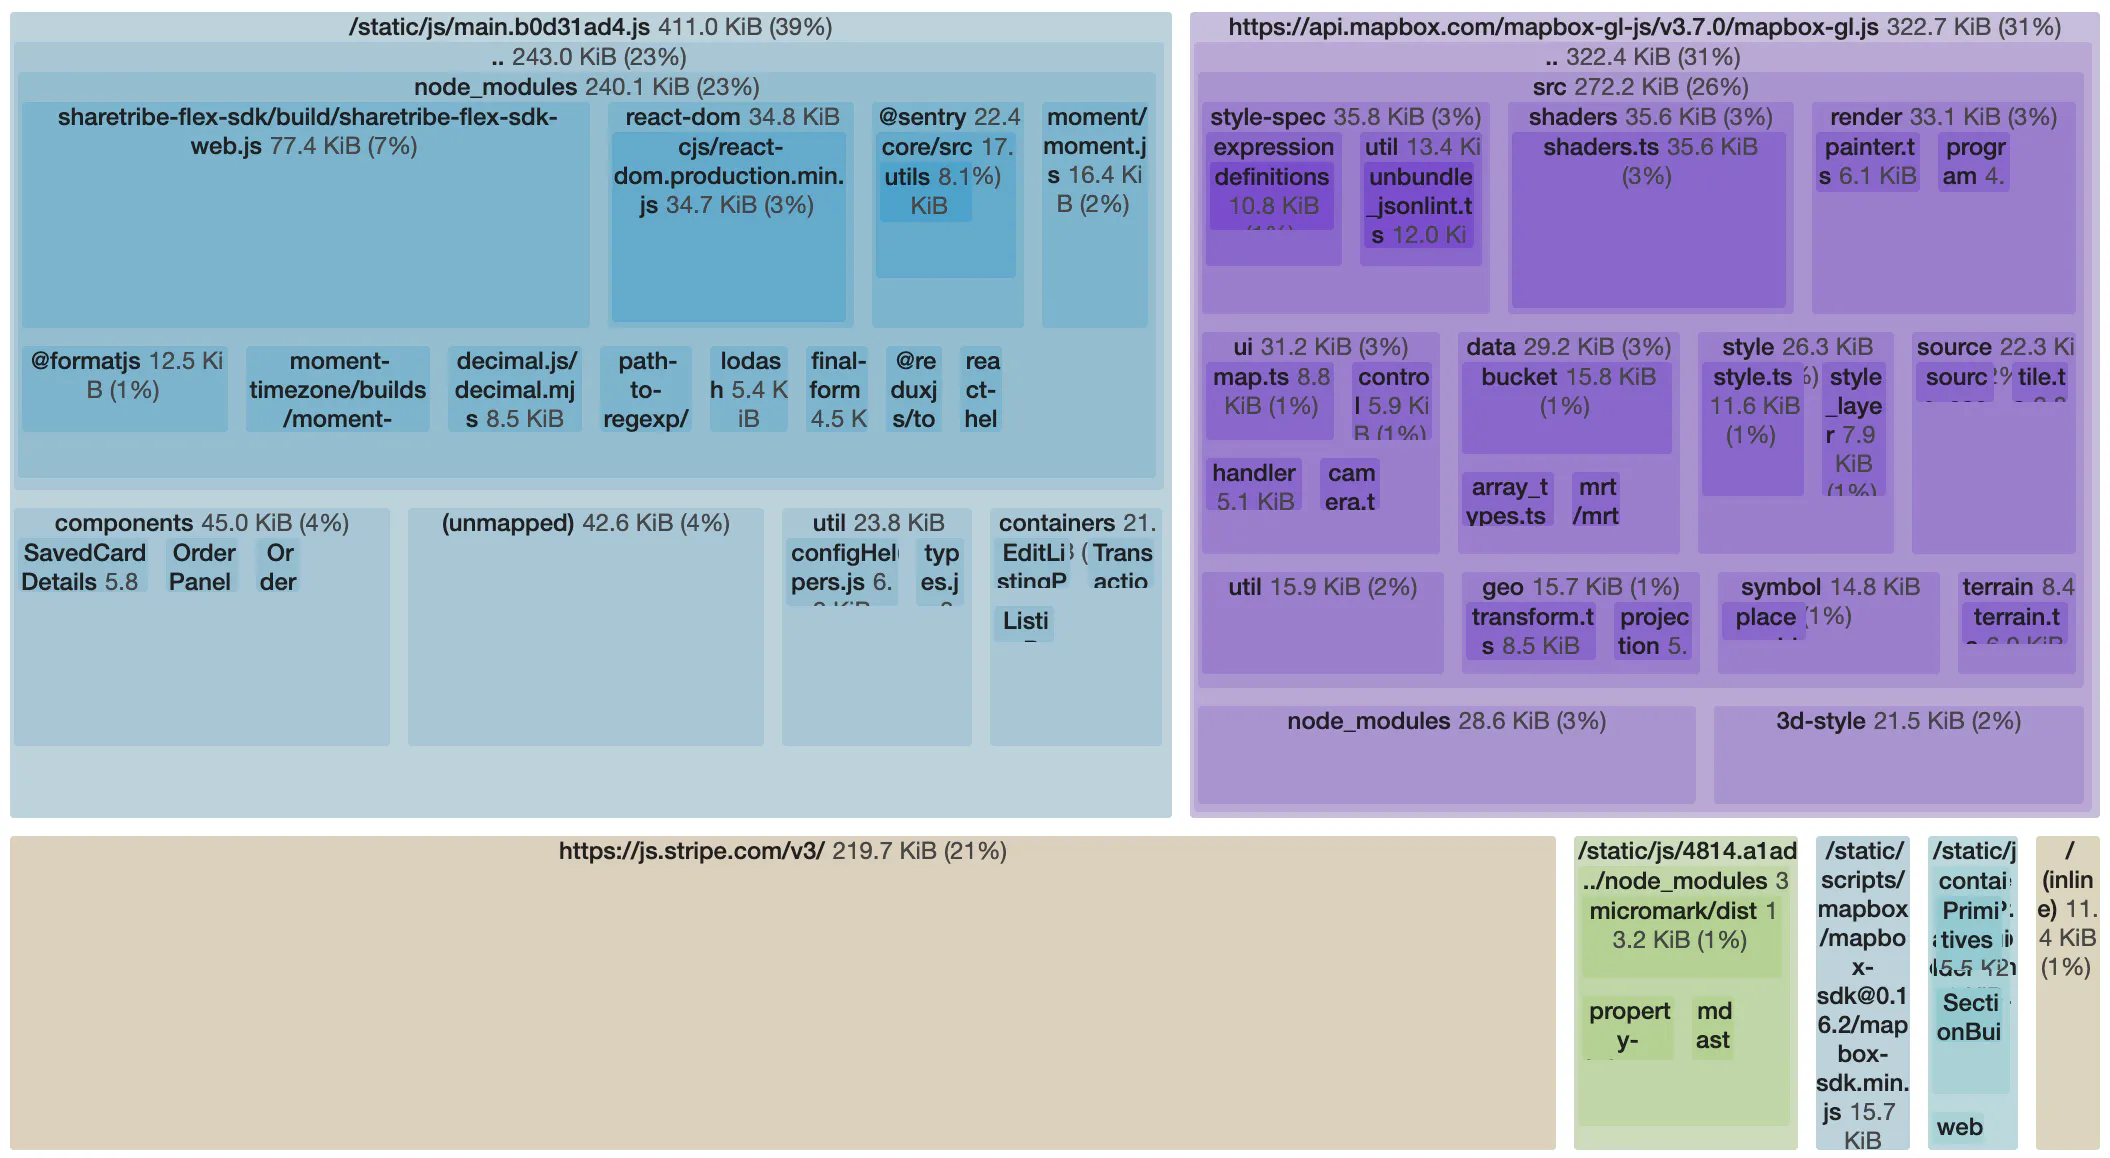 Updates to Sharetribe Web Template webpack configurations
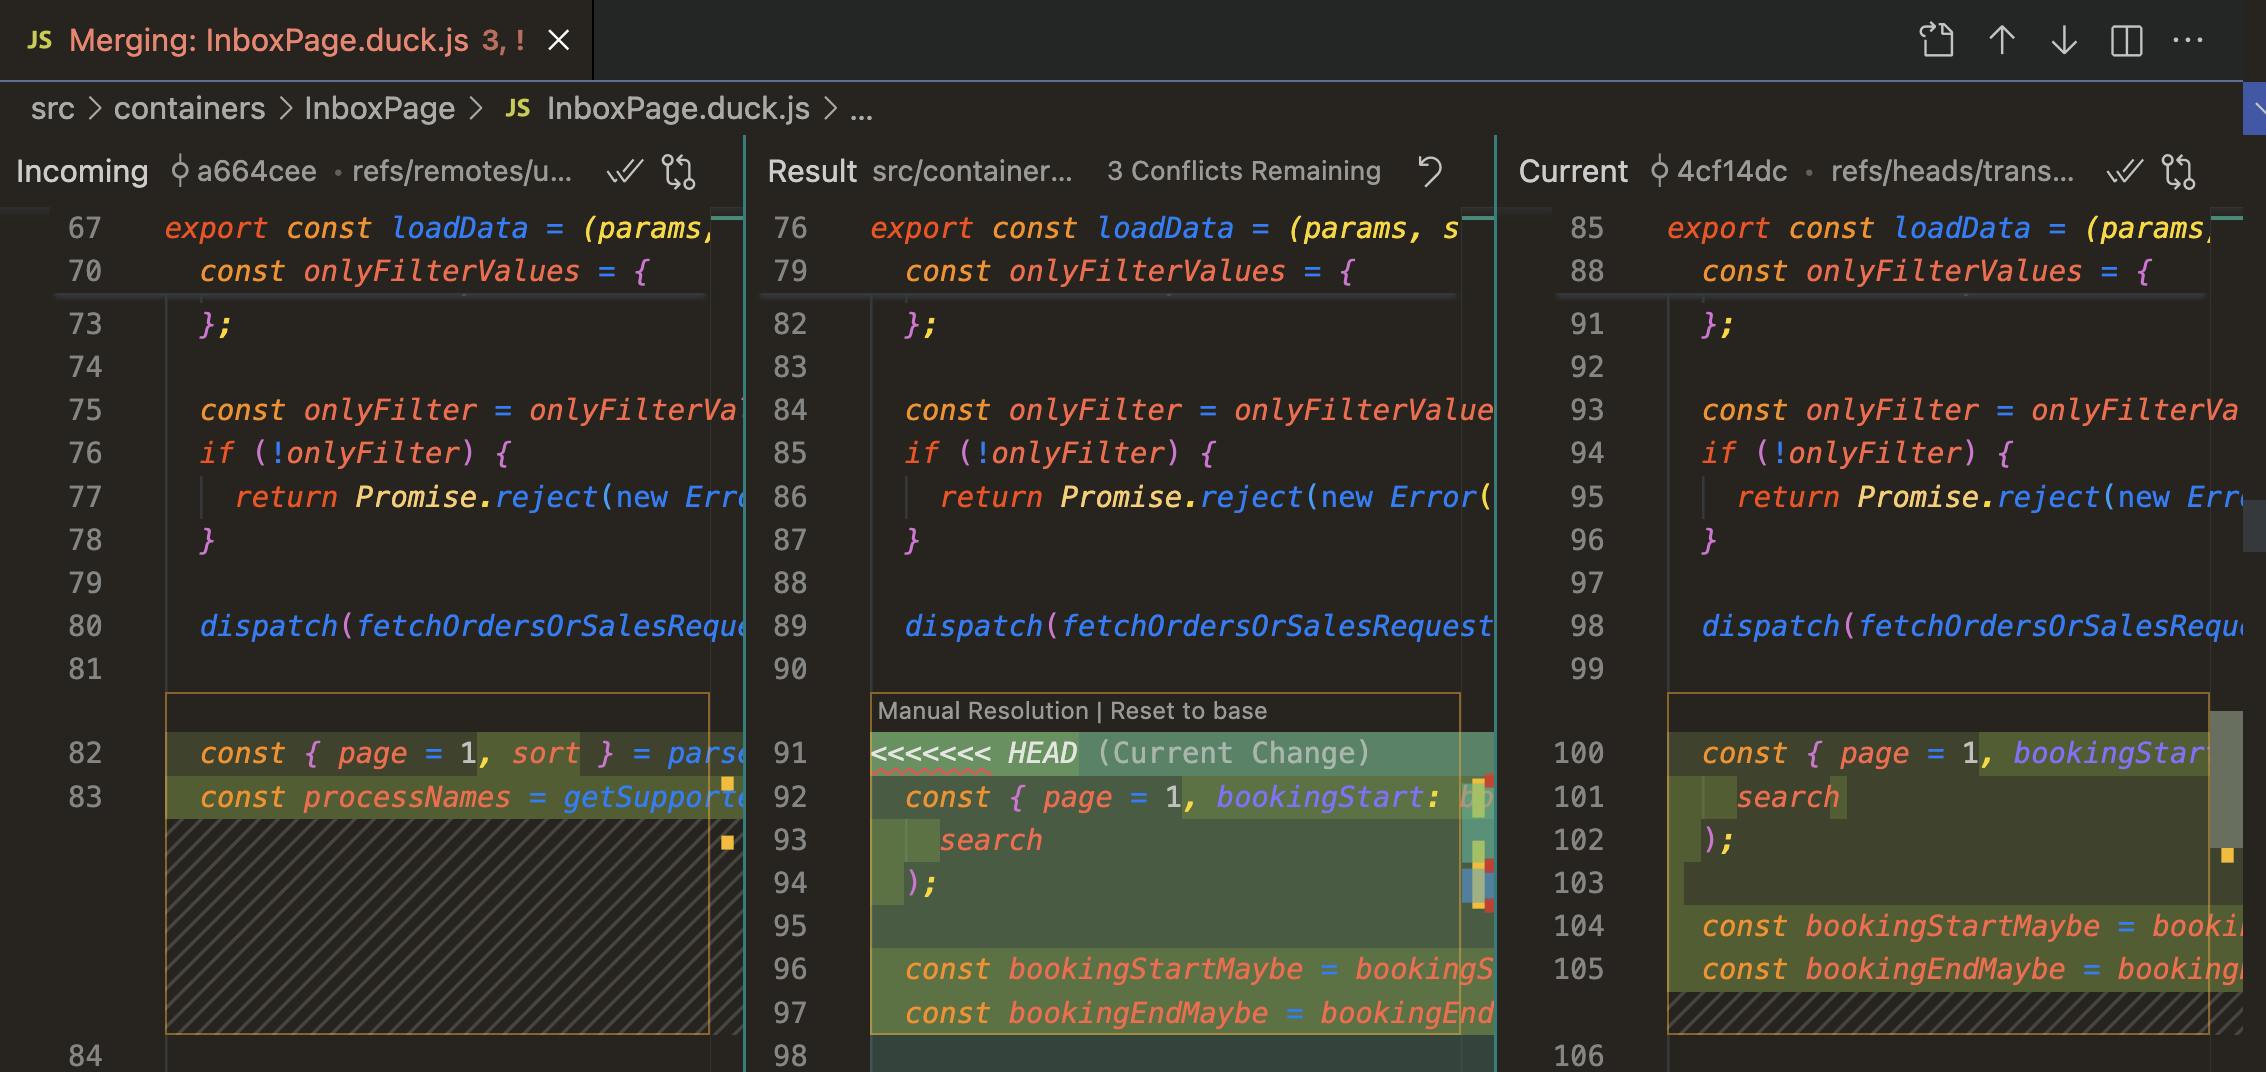 Updating your custom Sharetribe Web Template from upstream
 Add transaction filtering to your marketplace inbox page
 Modify listing card thumbnails
 The Sharetribe Web Template: Thoughts from a new DA
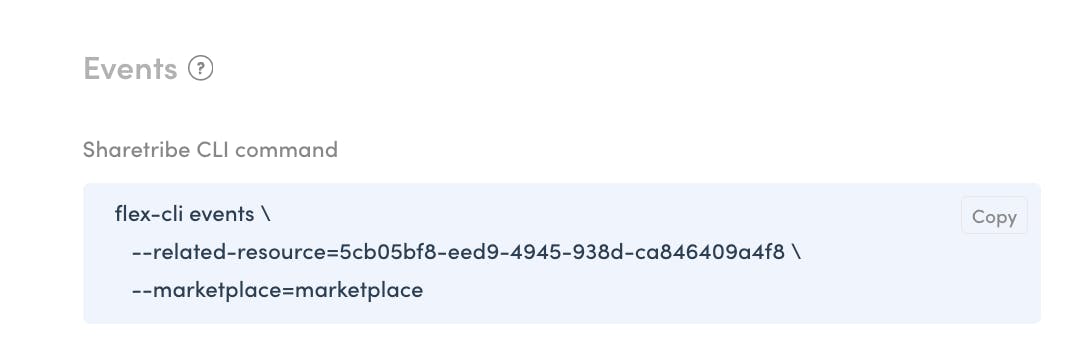 How to get the most out of events with the Sharetribe CLI
 Deploy a Sharetribe marketplace on AWS EC2
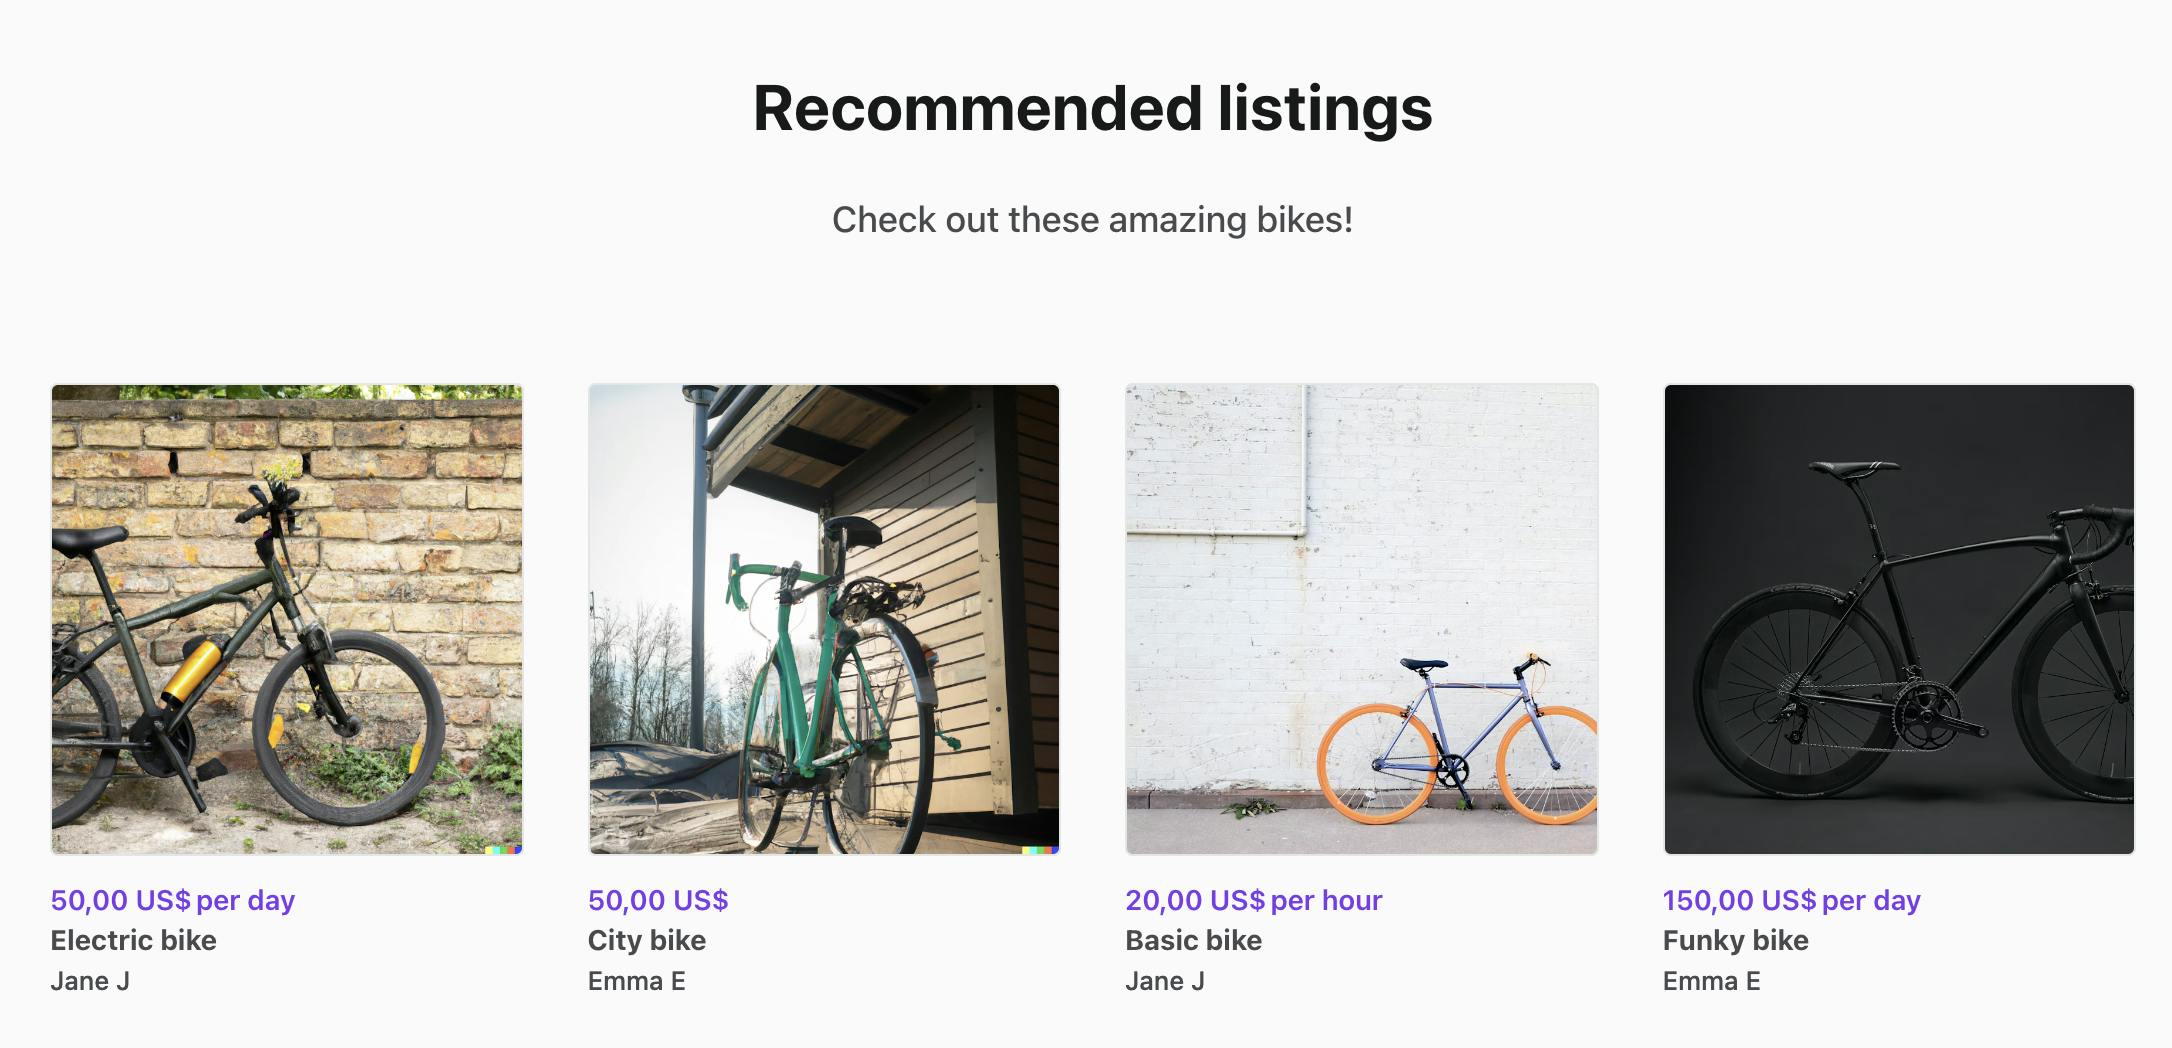 Custom section components on Sharetribe’s CMS, Pages
 Checking out a marketplace shopping cart
 Showing purchased cart listings
 Designing a shopping cart transaction flow
 Calculating shopping cart price
 Viewing cart items
 Adding items to cart
 Building a shopping cart for a Sharetribe marketplace
 Content Security Policy
 Sharetribe's Postman collection
 Introducing Sharetribe's Developer Advocacy team