Last updated
User Journey - Sneakertime
User journey for Sneakertime, the Flex template for selling products
Table of Contents
Sneakertime template is designed to be a starting point for marketplaces where products are bought and sold. Sellers list their products–in this case sneakers–and manage inventory and fulfilment. Customers find, purchase, and review sneakers and sellers.
Sneakertime, as any typical marketplace, has three distinct user journeys:
- Search: Search happens when customers search for listings on the marketplace using some combination of keywords, availability, filters, and sorting.
- Listing creation: Listings are created by providers to promote a product or service they are offering, with the exception of reverse marketplaces where the customer creates listings. What information providers enter into a listing, such a price or category, is usually the basis for the customer’s search experience.
- Transactions: The transaction process determines how a customer and providers interact on the marketplace, whether it is to rent, sell or interact otherwise.
In this article we’ll explore in depth how search, listing creation, and transactions work in Sneakertime.
Search Journey
The search journey defines how users search and find product listings in your marketplace. Starting on the landing page, users progressively narrow their search to find the service, rental, or product they need. Users might find what they need by searching nearby locations or via keywords. Results should be filtered by relevant criteria, like price or category.
Click through the slideshow below to see the search steps and capabilities that come for product marketplaces out of the box with the Sneakertime template.
Search journey 1/3
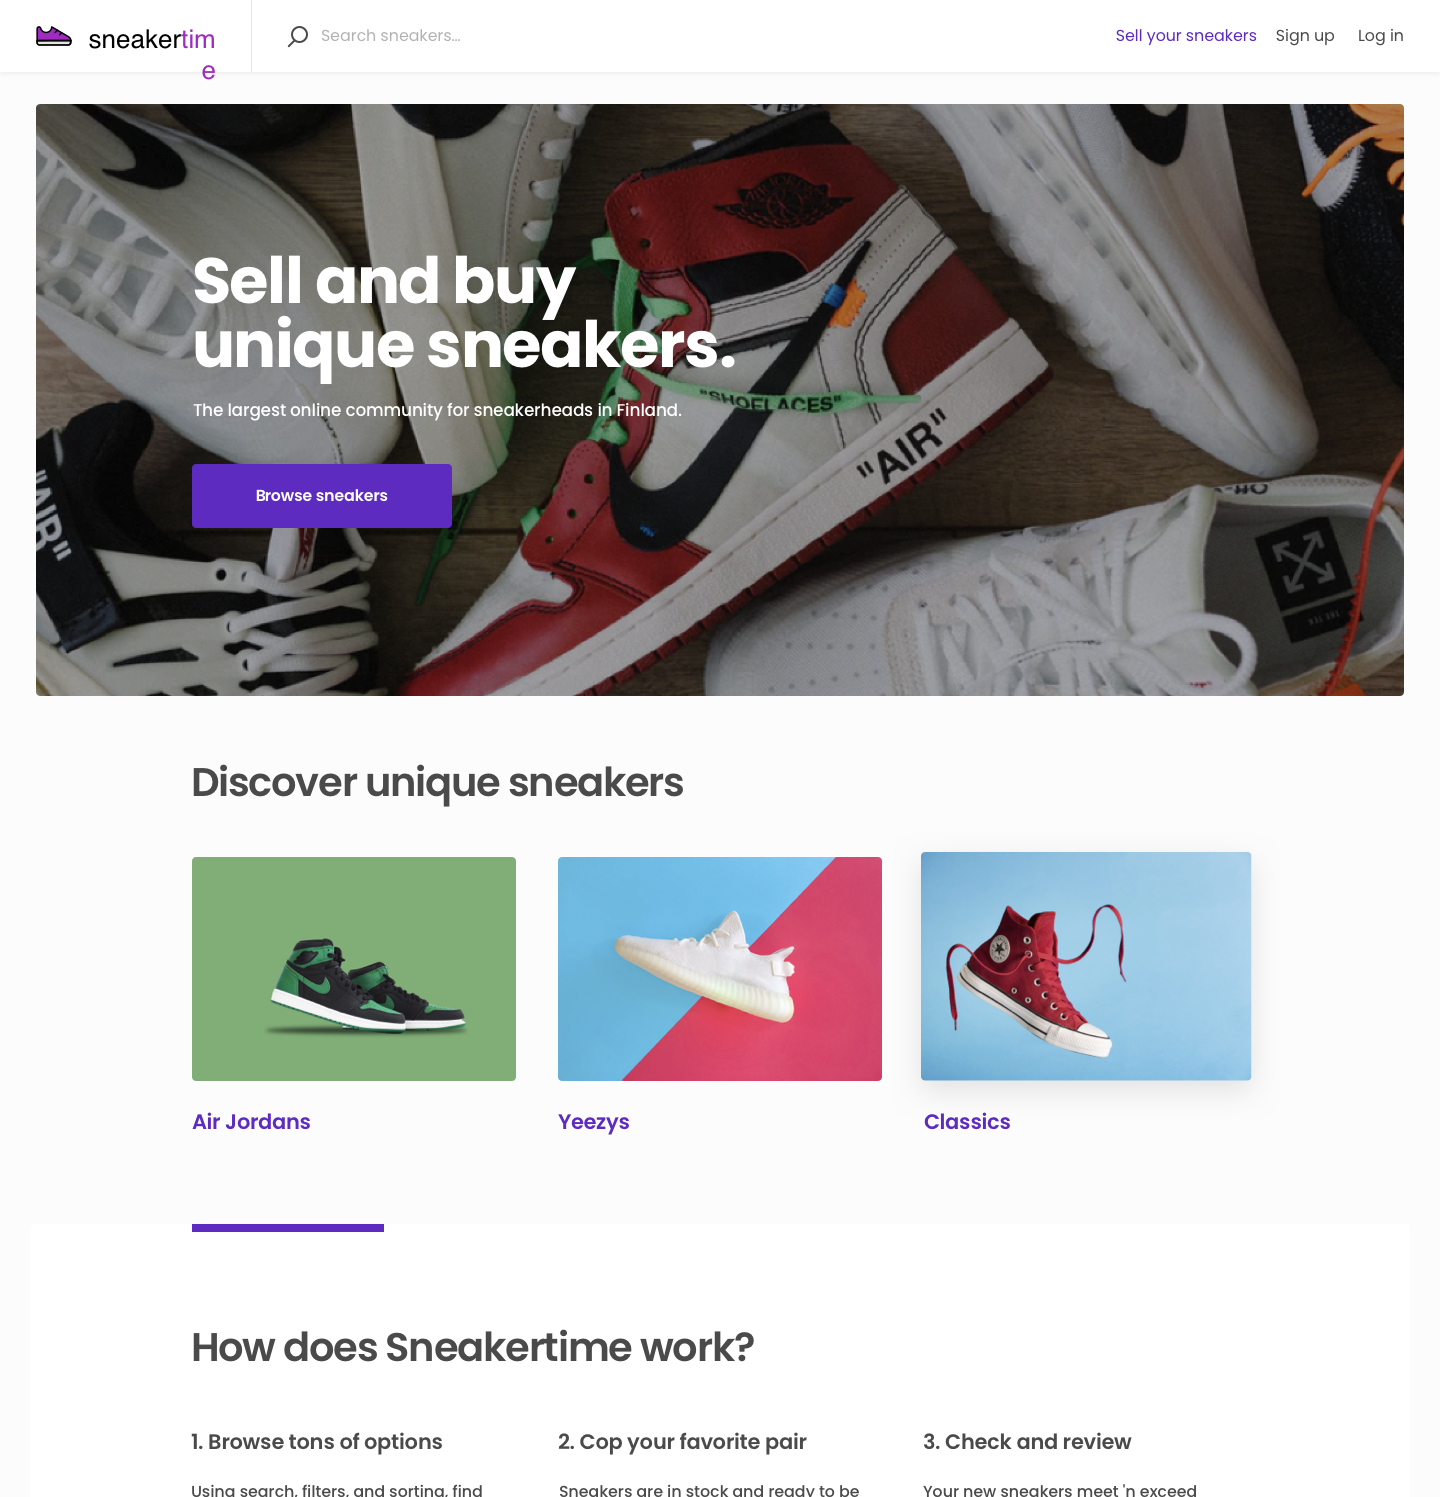
Landing Page
The landing page tells users what the marketplace is all about. Customers can search for product listings by keyword using the top bar. Or they can click on predefined categories below the hero image. Customers can also see all sneakers through the main call to action button "Browse sneakers".
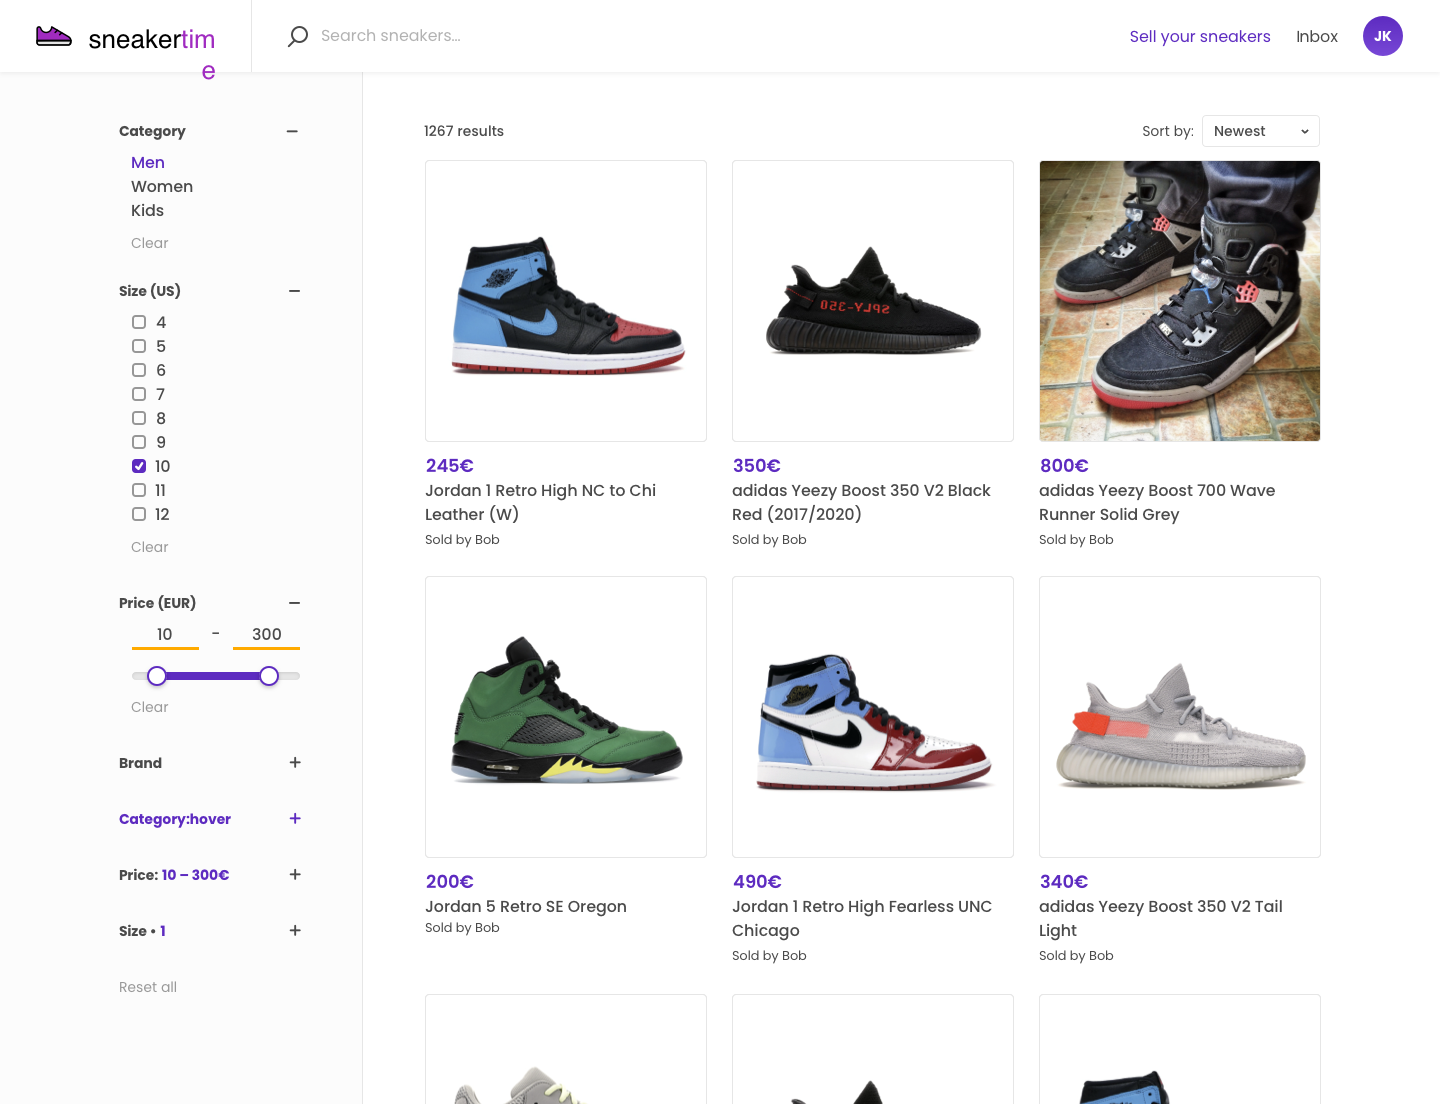
Search Page
Customers browse listings on the search page. Listings are visible as cards in the center of the screen. Listings can be sorted by parameters such as price. A menu of different filters, like category (choose one) or size (choose many), lets buyers narrow down results. The listing results update automatically when a new filter option is selected.
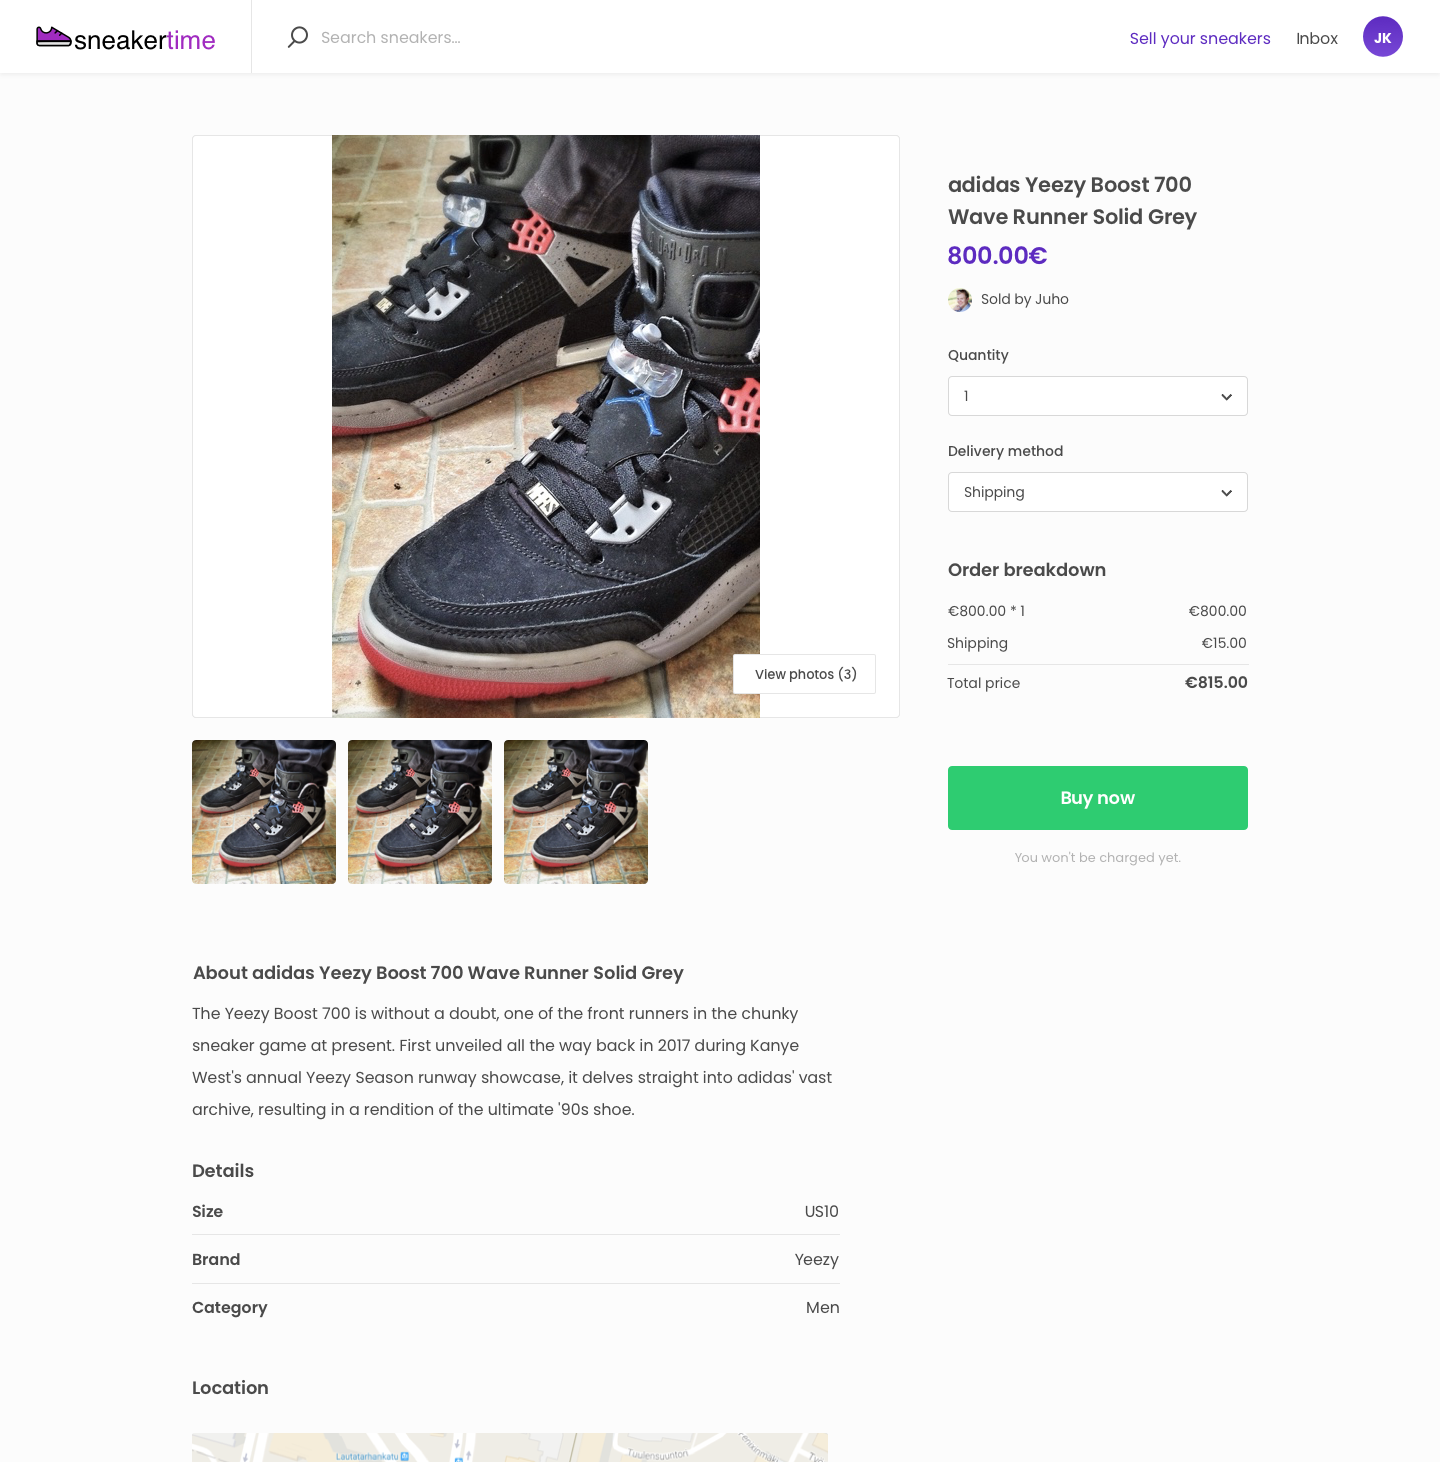
Listing Page
Users view detailed information about the product on the listing page. Reviews including a comment and 5-star rating are displayed on the listing page too. Users can make their product selection (delivery method, quantity) and “Buy now”. They can also access the seller’s profile page, where their other products are displayed, from the listing.
Listing Creation Journey
Sellers create listings to show what they are offering on the marketplace. Listings can advertise services, products, or rentals, or, in reverse marketplaces, they are jobs providers apply to. The information collected in a listing typically influences what parameters are available during the search journey. The unit of value that is listed also influences how a transaction journey should progress.
Click through the slideshow below to see how sellers add their sneaker listings to the Sneakertime, adding details like delivery and stock.
Listing Creation journey 1/7

Landing Page
Providers in the Sneakertime marketplace create and list their products through a listing creation wizard. The wizard is accessed from the top bar's "Sell your sneakers" call to action button.
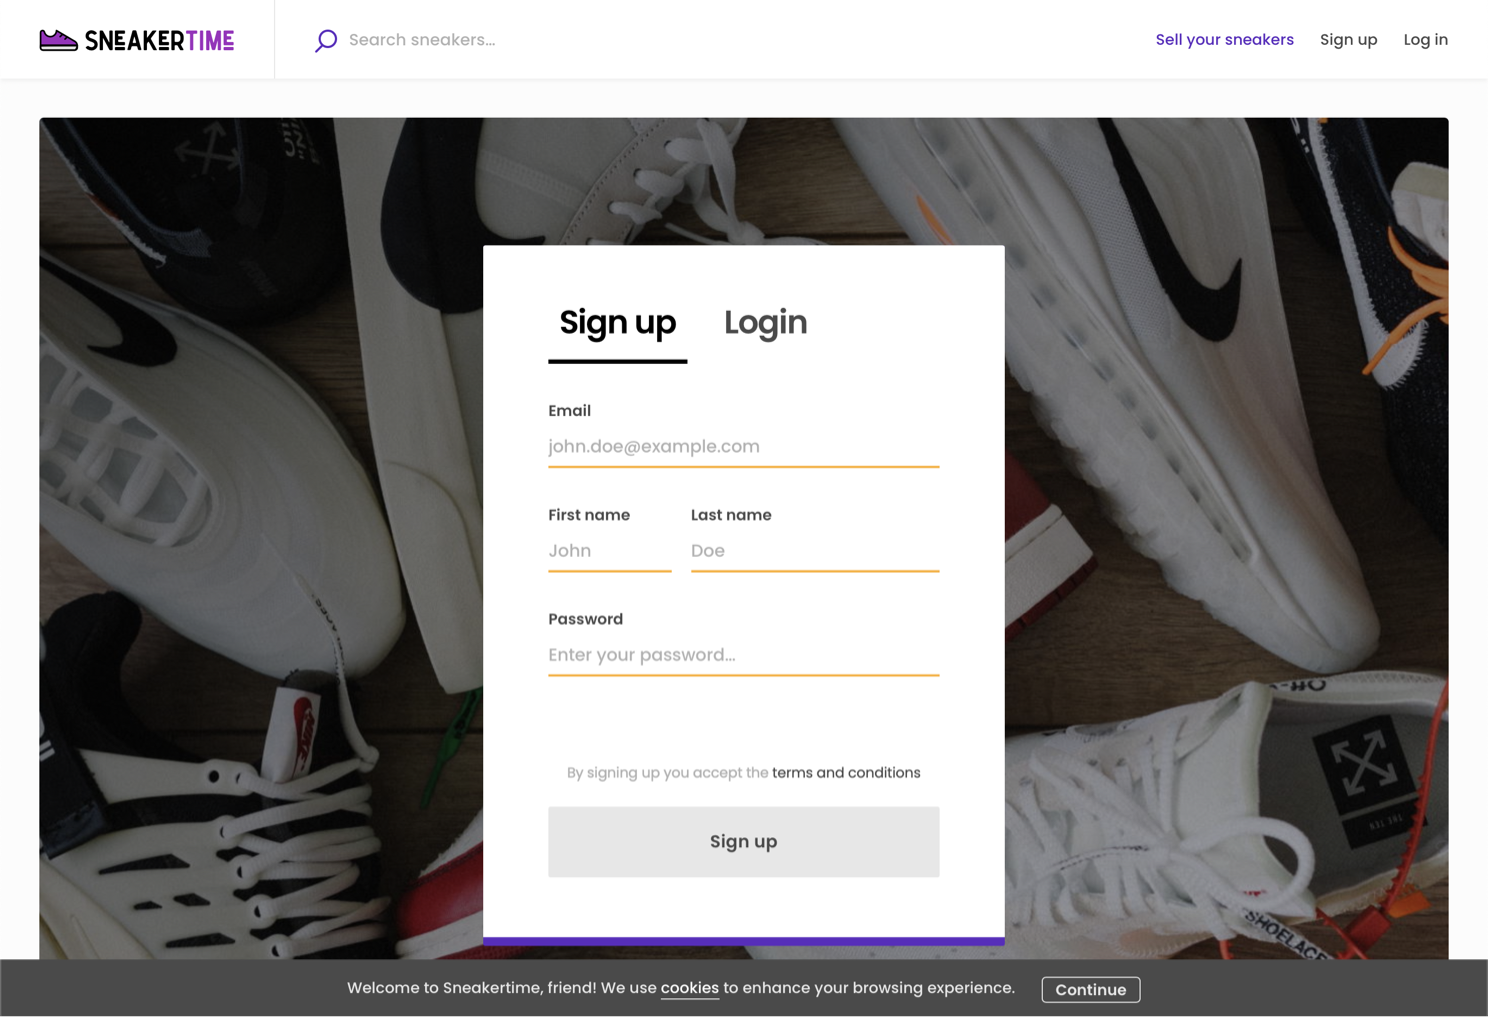
Authentication Page
Users must first login to create listings, or signup to create an account. Sneakertime asks for the user's email, first and last name, and password. Anyone with a user profile can create listings on the marketplace.Signing up accepts the marketplace's terms.
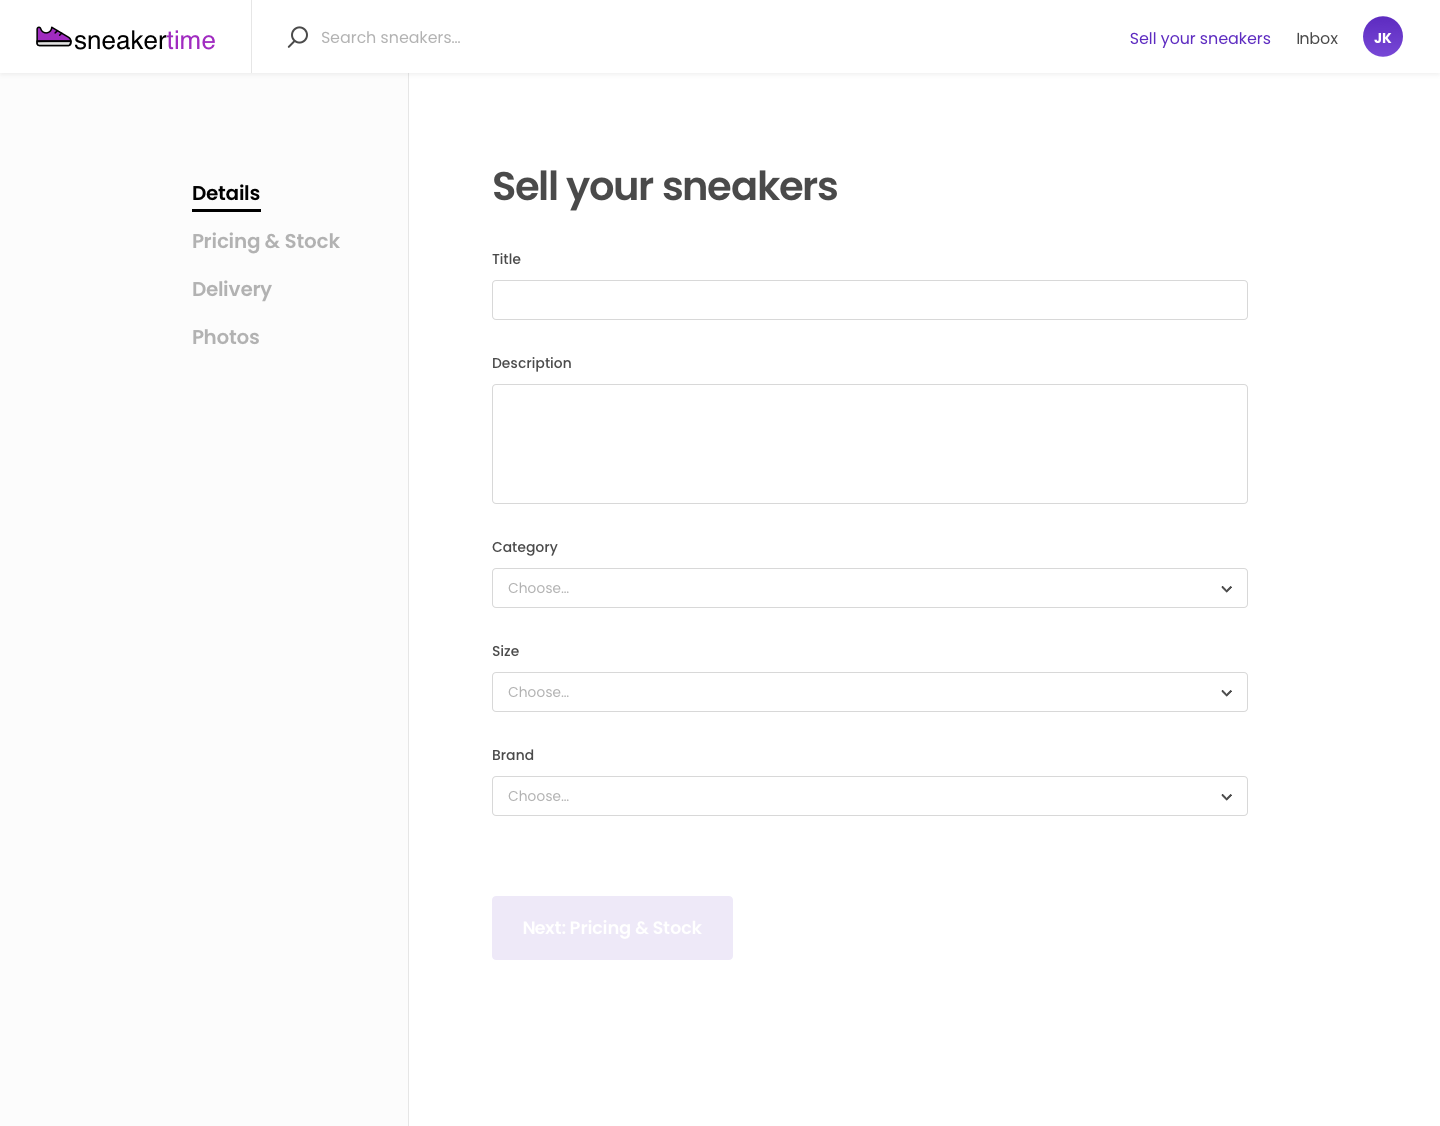
Listing creation wizard - Description
Sneaker listings are created through the listing creation wizard. In Sneakertime, the wizard includes 5 steps. Providers first enter identifying information about the product, including fre text, single select, and multi-select fields. Information in these fields is used to return relevant results during customers’ search.
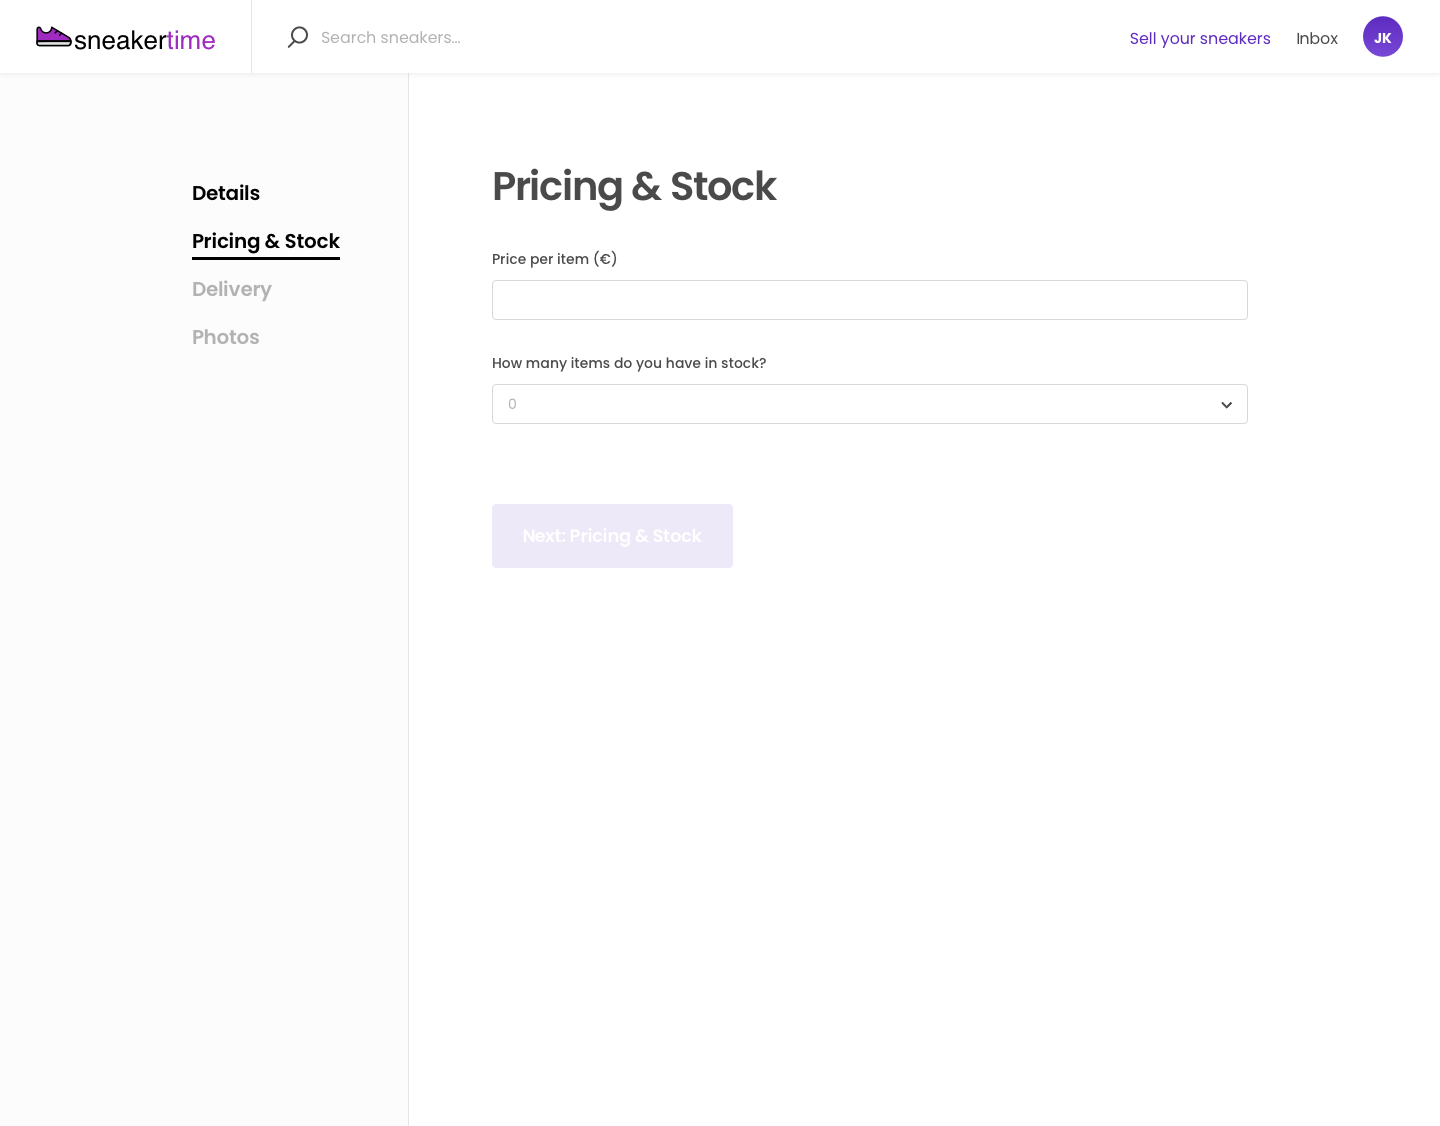
Listing creation wizard - Stock
Next providers are asked to set their product price and how many they have in stock. Customers can buy as many products as the seller makes available. Stock amounts are automatically managed based on purchases, cancellations, and inputs from the provider.
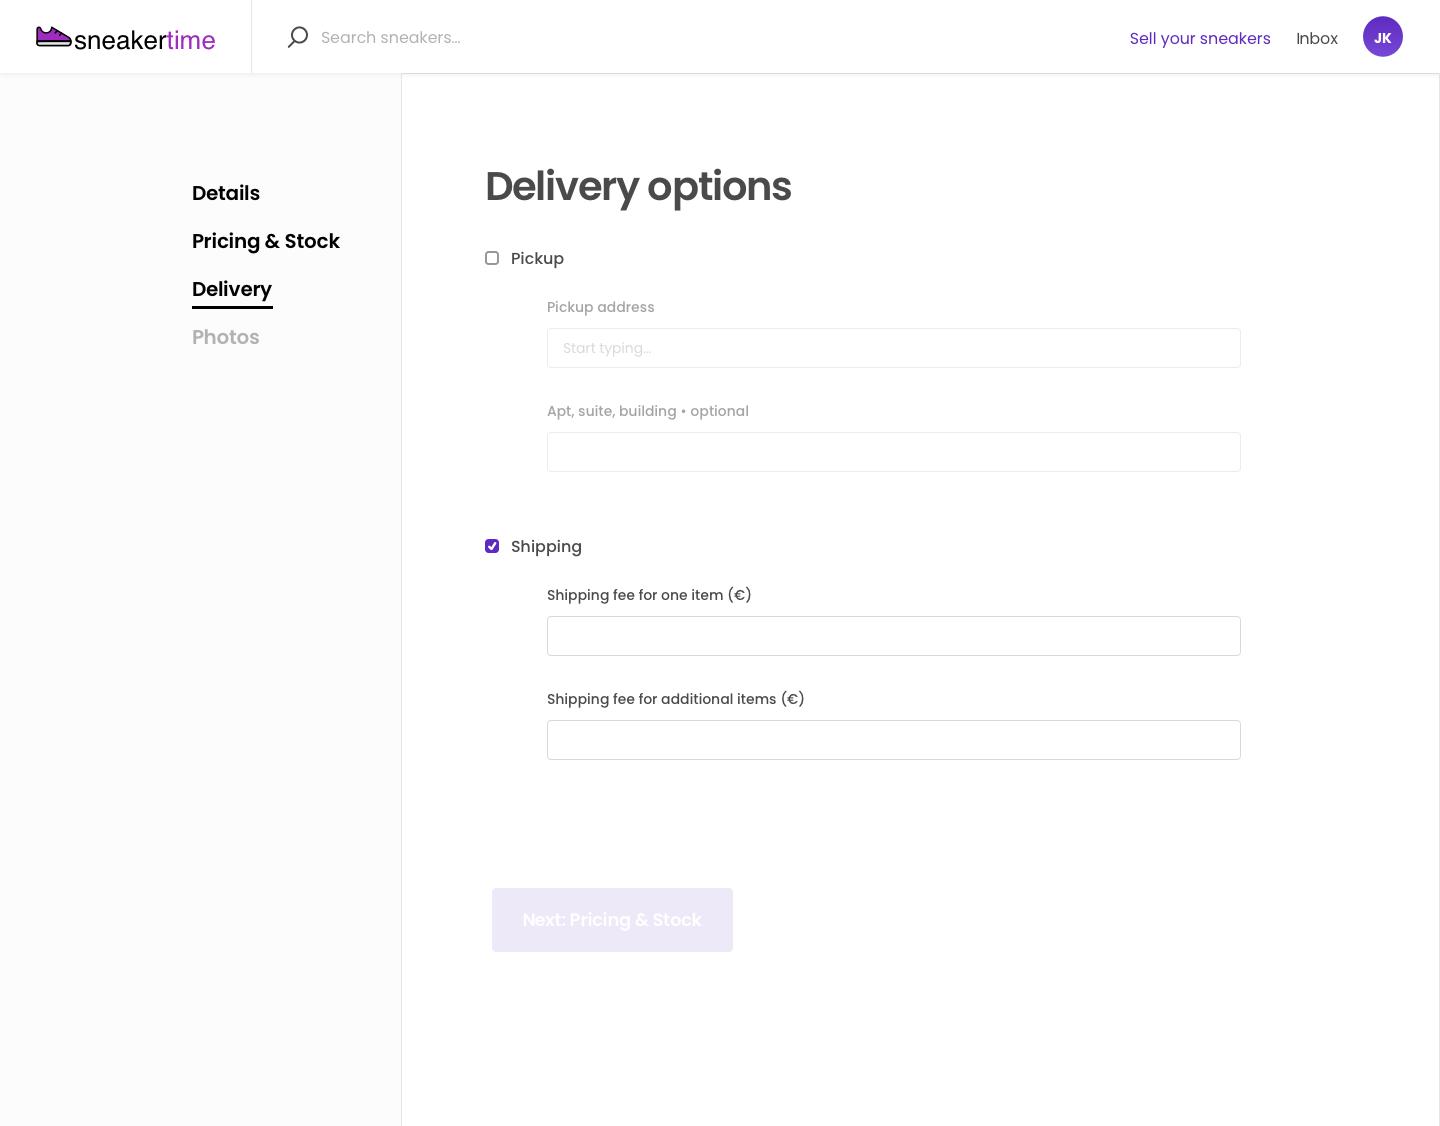
Listing creation wizard - Delivery
Providers then determine how they can deliver the product to the buyer. Sneakertime sellers can disclose a pickup location and/or determine the price they charge for shipping. The shipping price is added to the purchase amount paid by the buyer during checkout.
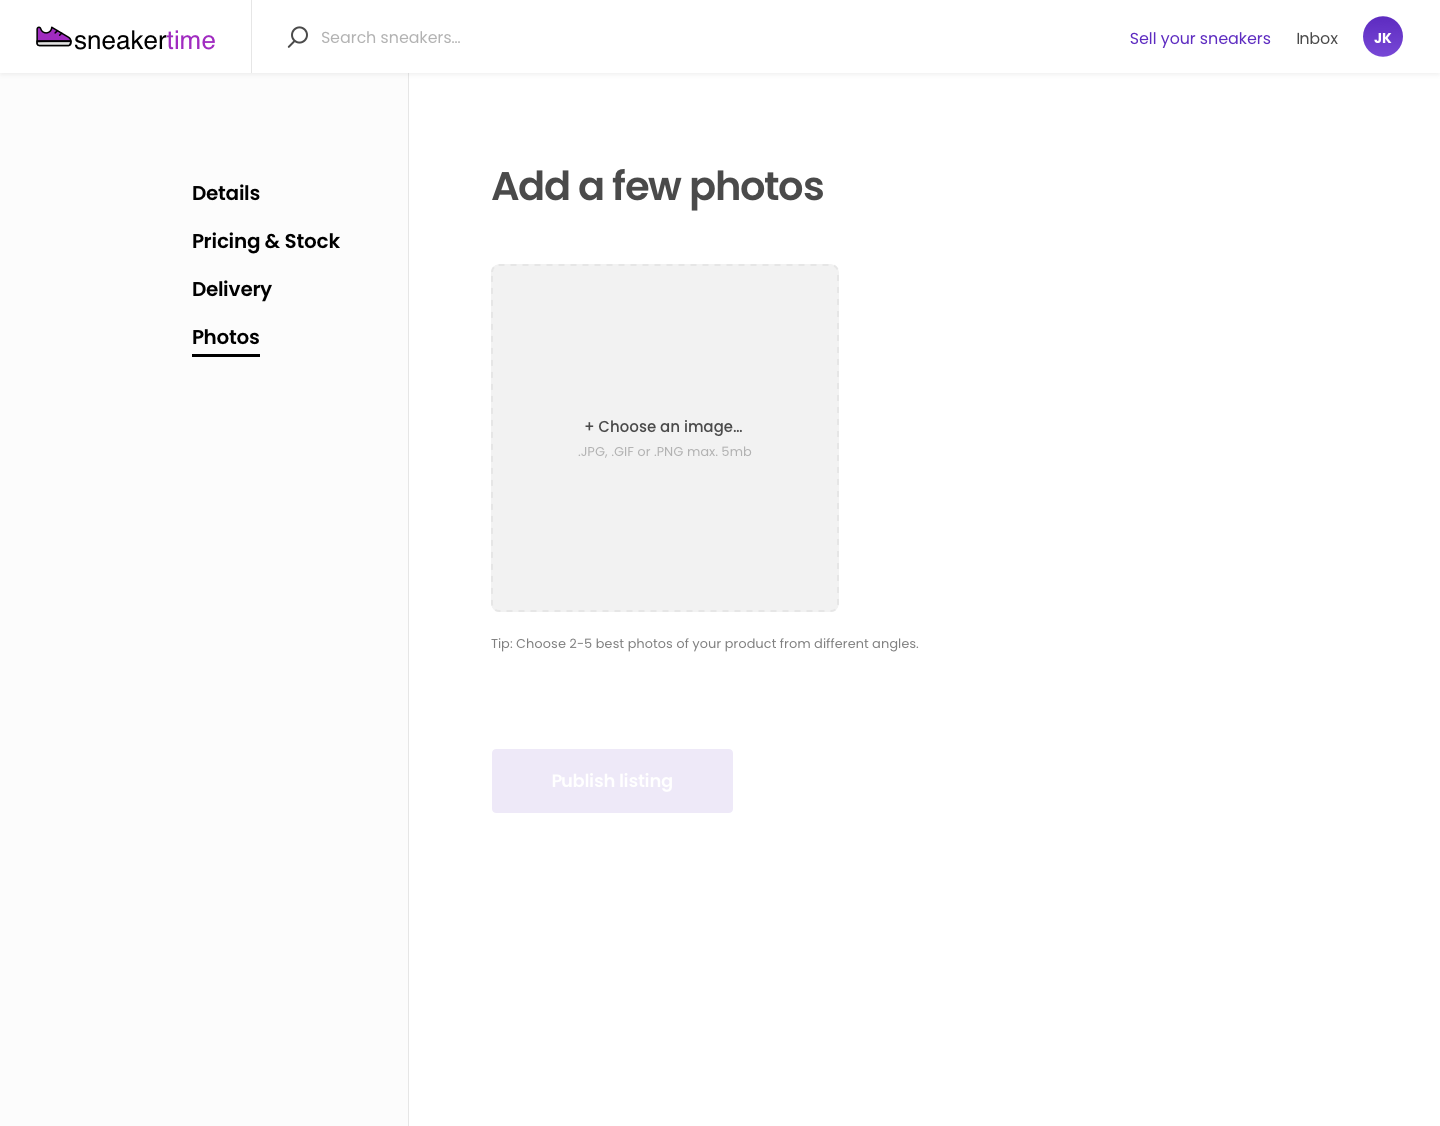
Listing creation wizard - Photos and payout details
Finally, providers can upload a few photos to display on the product page. Stripe Connect, Flex’s default payment and payout system, asks the provider for details related to their identity and bank information. Once approved, providers can process payment card payments and receive payouts automatically on the marketplace.
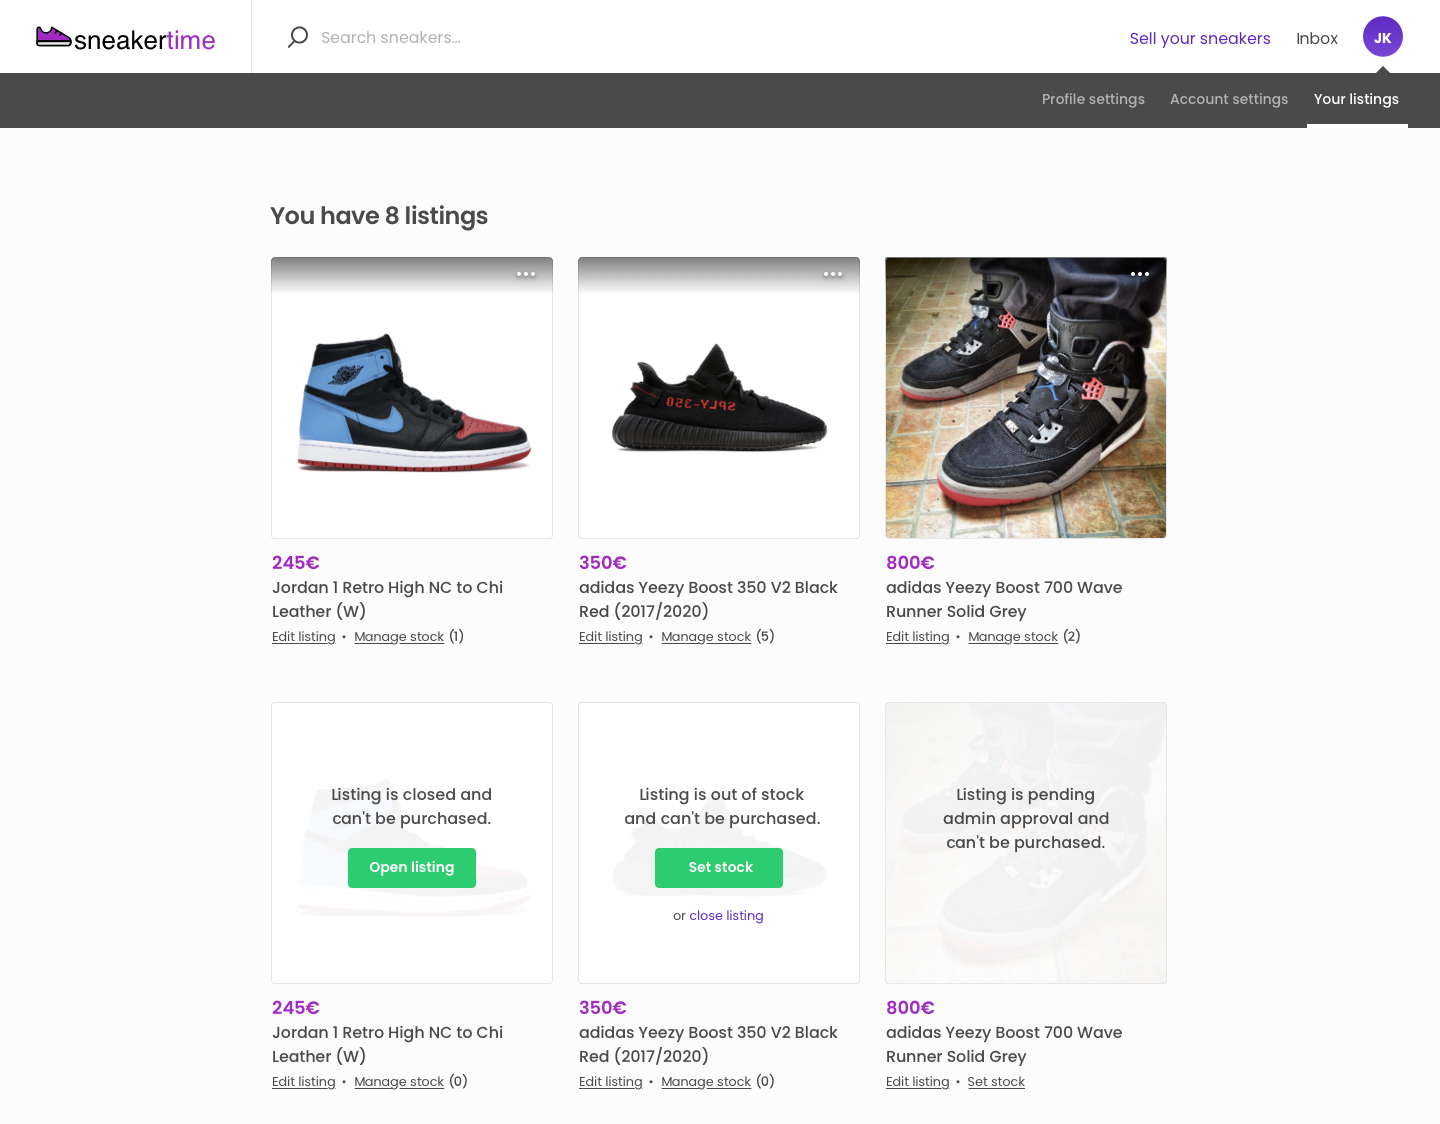
Manage Listings Page
The user can view their own listings in the “Your listings” meni, where they can see all the listings they’ve added. From this page they can see how much stock each product has, and manage stock and edit listing details.
Transaction Process
The transaction process defines how booking or buying events happen between the listing provider and the purchasing customer. Sharetribe Flex lets you extensively customize the rules and steps of your transaction process to govern how providers and customers capitalize on your marketplace.
Click through the slideshow below to see how customers purchase sneakers on the Sneakertime template.
Transaction Process 1/7

Listing page
Sneakers are purchased via the product listing page. First, customers view and select the suitable delivery method and quantity from the menu on the right hand side. The price is calculated based on these choices. Customers press “Buy now” to proceed.
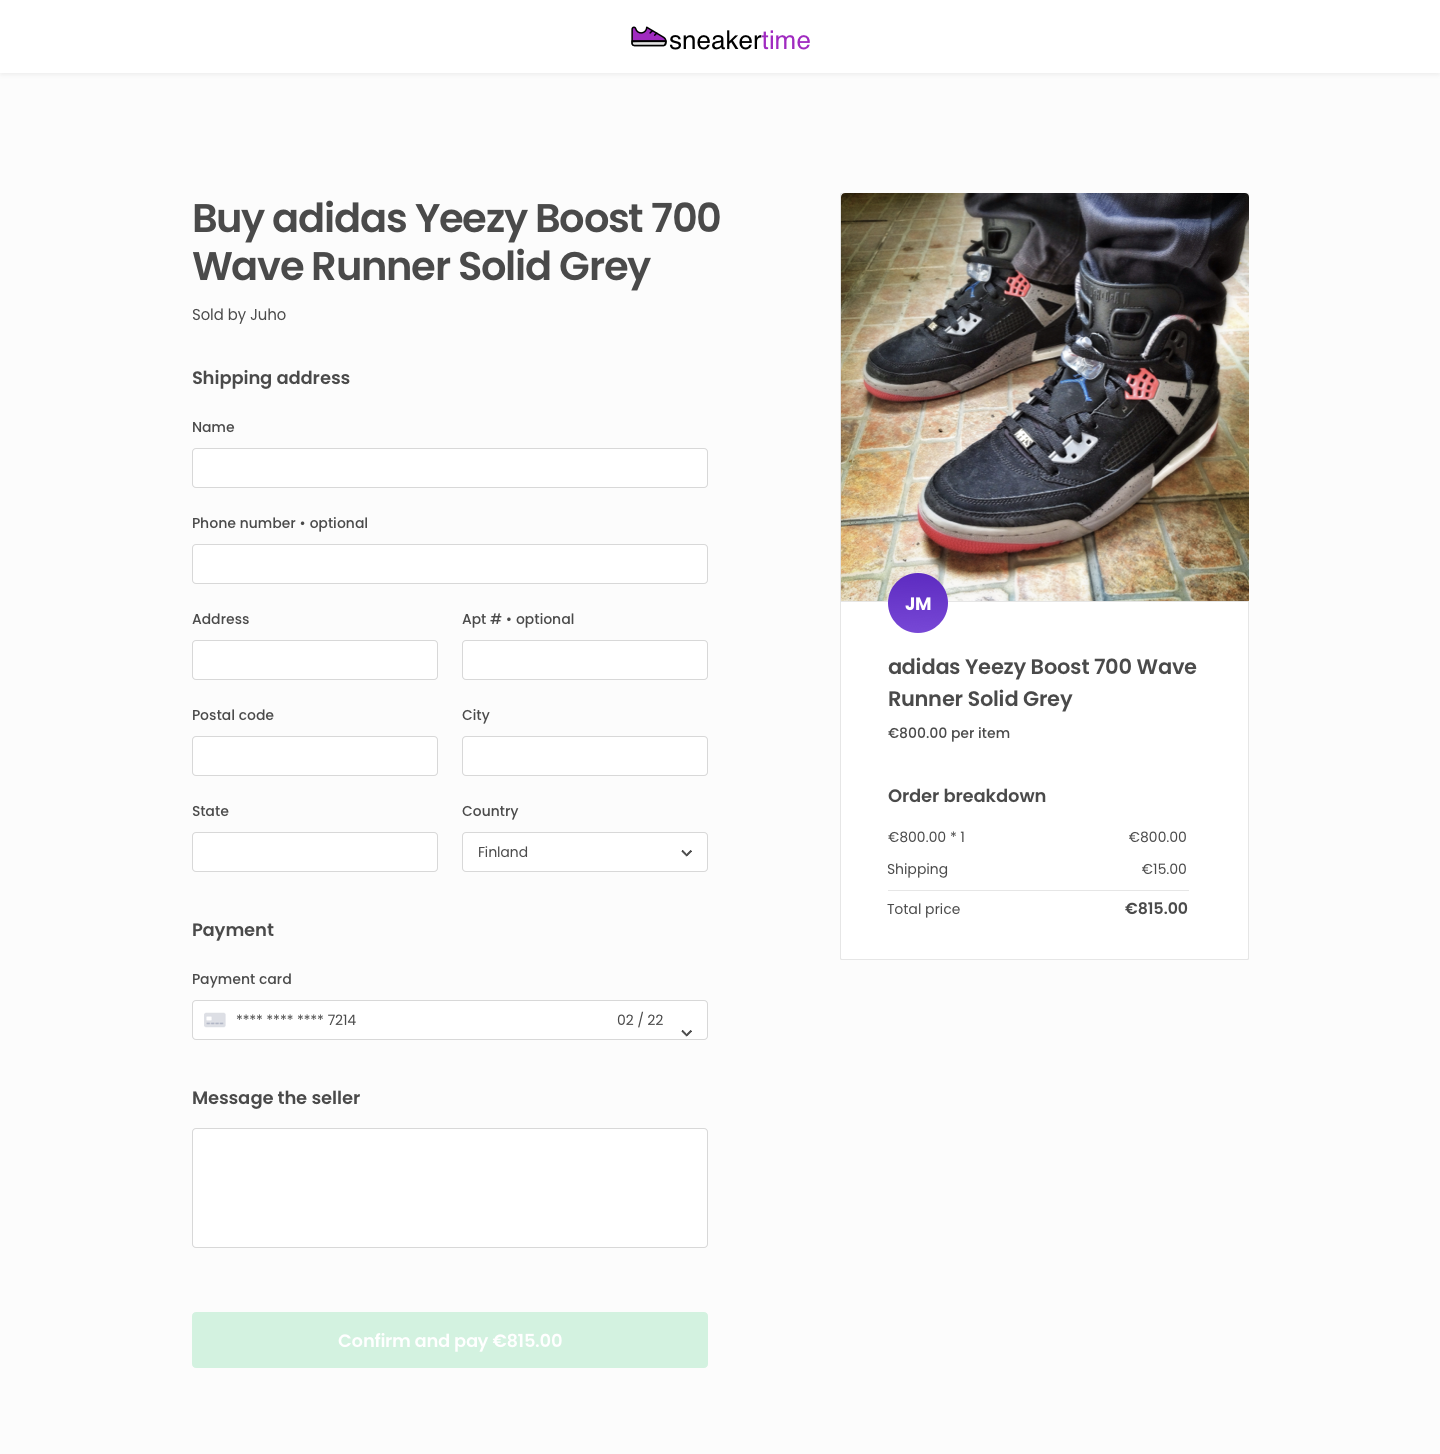
Checkout Page, Returning Customer
On the checkout page, customers enter their payment card and billing details, and their shipping details if they need the product shipped. They can also send a message to the provider. The transaction process starts when a customer confirms and pays. The payment is captured immediately and the provider is notified of the sale via an email.
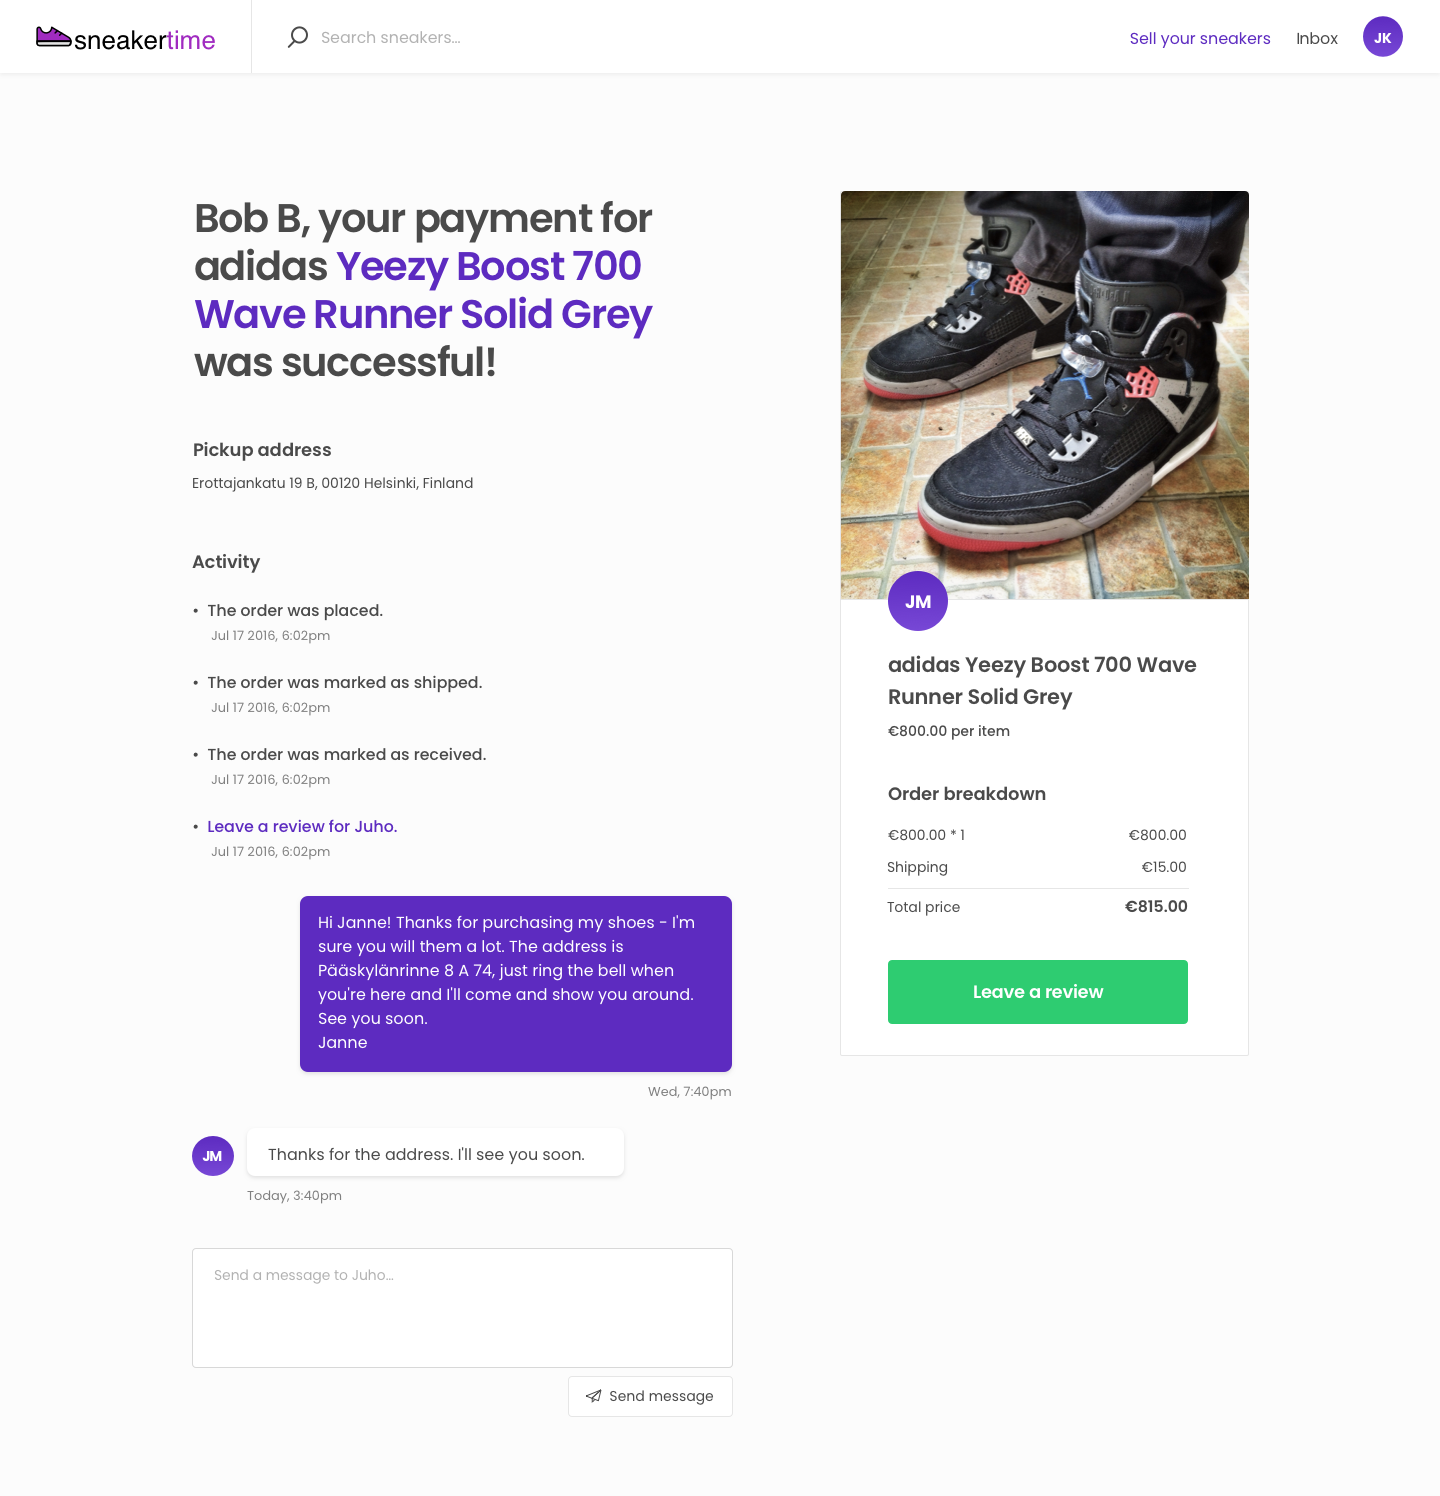
Transaction Page
The transaction page is visible to the customer and provider after a purchase is made. It shows all information related to the purchase, including current status, amounts paid and earned, calls to action, and past messages. The customer and provider can also message on this page. The transaction page can be accessed from the user's Inbox.
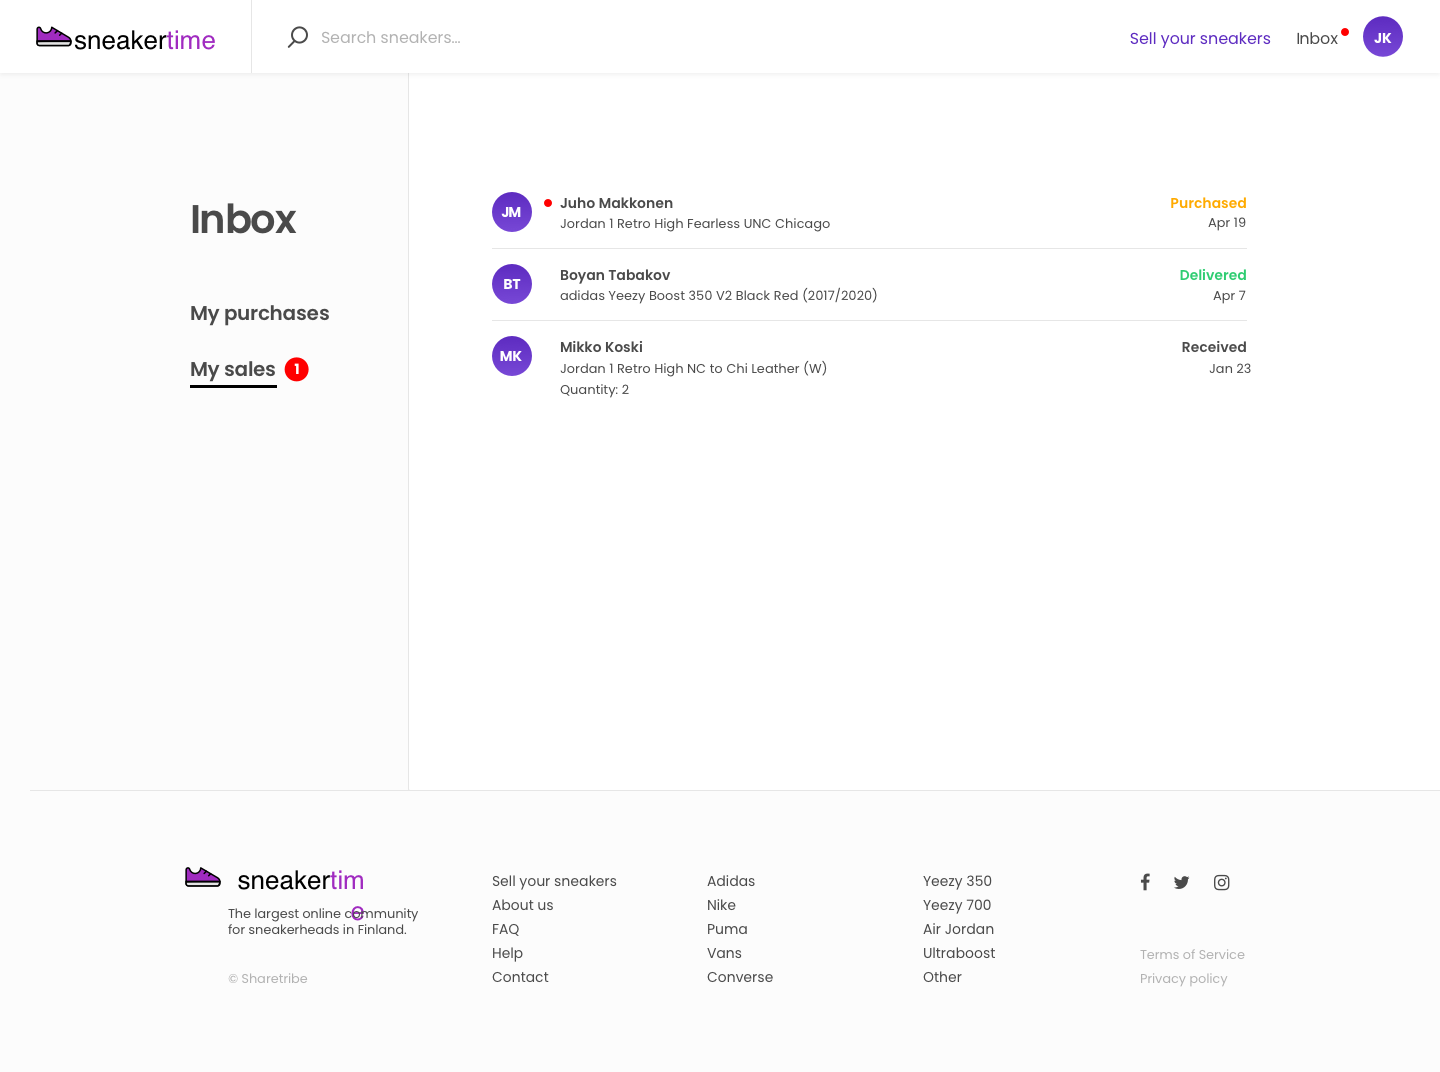
Inbox Page
The Inbox is clicked into via the top bar. “My Purchases” shows transactions where the user purchased sneakers and “My sales” shows transactions where the user sold sneakers.
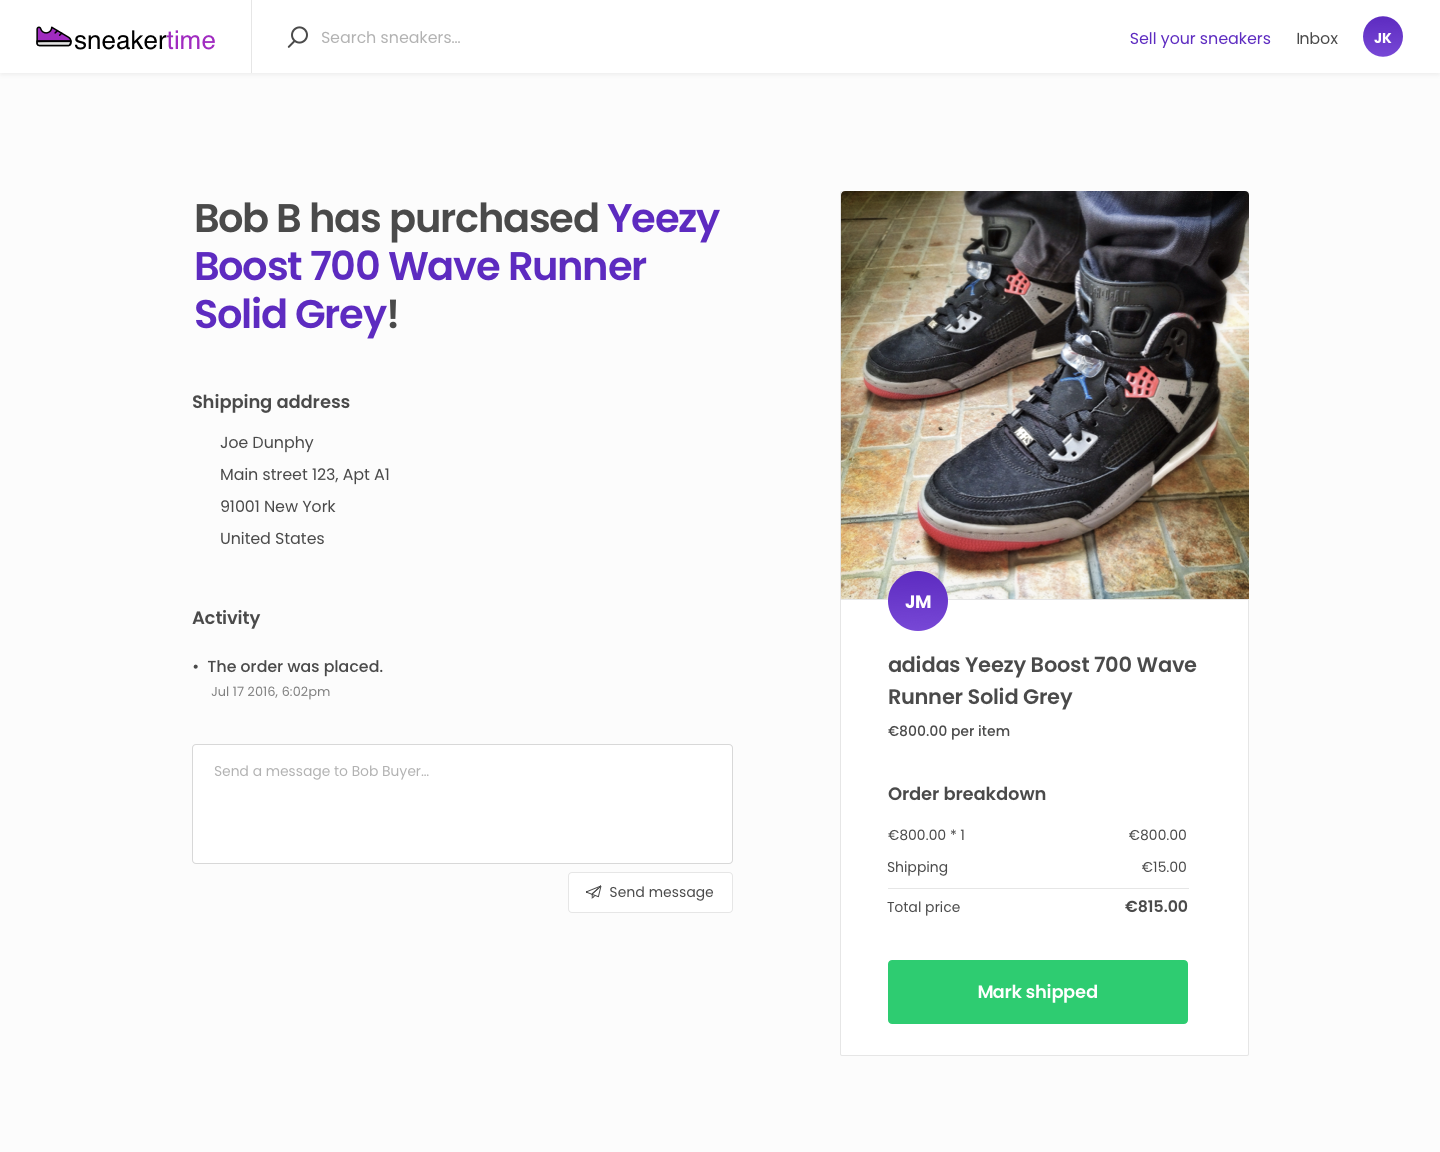
Transaction Page - Provider’s View
Providers receive purchase notifications after the customer submits their payment details on the checkout page. If the order is shipped, they can mark when it’s done to notify the buyer. If the provider does not react to the purchase within 14 days, the purchase is automatically cancelled and a full refund is issued.
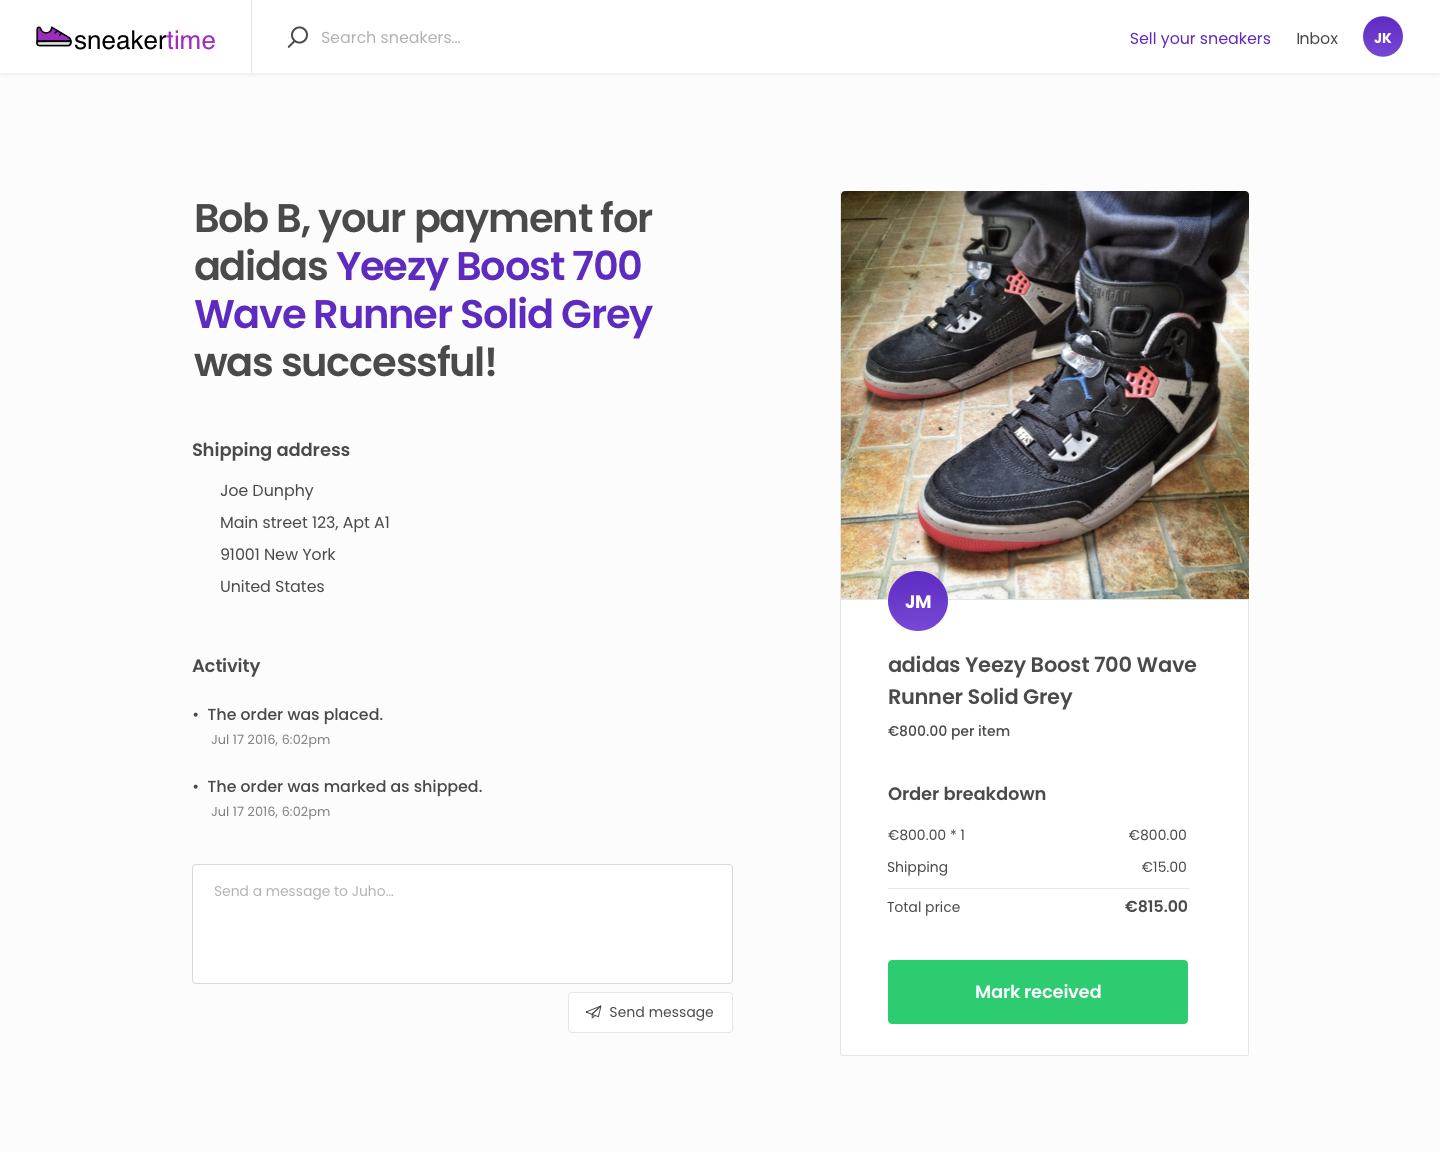
Transaction Page - Customer’s View
Customers can mark orders completed, raise a dispute with the transaction, and message with the seller during a transaction. Marking the order completed triggers a payout to the provider and starts the review period for the product. Shipped purchases are also auto-completed and providers paid out two weeks after product was marked shipped.

Leave a Review, provider’s view
A transaction is automatically completed after the reserved booking period ends. The provider's earnings minus Yogatime’s 10% commission are paid out to their bank account. The users are prompted to review each other when a booking is completed.
Designing your marketplace’s user journey
Sneakertime offers a starting point for how users create products, discover listings, and transact on your custom product selling marketplace. Designing your own marketplace’s journeys helps developers understand how to modify this template starting point to build your custom marketplace. The next article guides you in creating your own user journey.


